Reprocessing Previously Unsupported Images
The other day, Apple released the Digital Camera RAW Update 5.02, which added support for a handful of Nikon, Olympus and Sony cameras. That's great news if you were thinking of buying one of those, but what if you already have one, and have been shooting RAW all this time, biding your time waiting for Aperture support? If that's the case, portions of your library may look like this…
 All these unsupported images must now go away!
By now you've probably noticed that as soon as you select one of those photos, it reprocesses automatically, and after a few seconds, your photo pops into view. That's fine if you only have a handful of images, but what if you have hundreds or even thousands?
Batch reprocessing
Fortunately there's an easy way to do this. Simply select all the unsupported images, and from the Photos menu, choose Reprocess Originals…, which will open the following dialog.
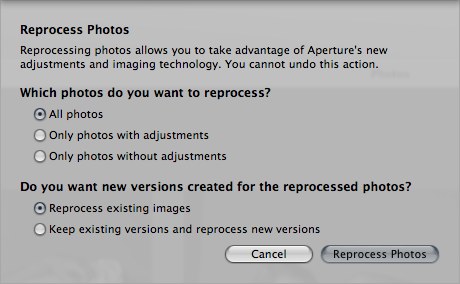 The Reprocess Photos command could be your friend during Digital Camera RAW updates
Since these images weren't even readable before, you'll just want to leave these settings at their default — reprocess all photos, and reprocess existing images. Those other options are there if you'd already adjusted some of your RAW files with a previous version of Digital Camera RAW, and wanted to reprocess them with the newest version, but potentially hold on to the existing images in case you preferred the way they looked before the update. I've had that happen before, where I'd already adjusted an image a ton (especially improperly exposed originals), and then the new RAW engine corrected many of the exposure issues on its own — so suddenly my images were double-corrected. But again in this case, just leave the default settings on.
Finding scattered images
What if you have hundreds, or even thousands of unsupported RAW files scattered all over your Aperture library, and want to update them all at once? Aperture's powerful search tools to the rescue!
Go to the Photos view (under the Library tab), so you are looking at every single photo in your library. If it's a big library, it may take a few minutes to load. Once it's loaded, click the magnifying glass in the top right corner (the one in the black box, not the one in the search window; highlighted in red below) and set the EXIF and File Type criteria to find only the images you're looking for.
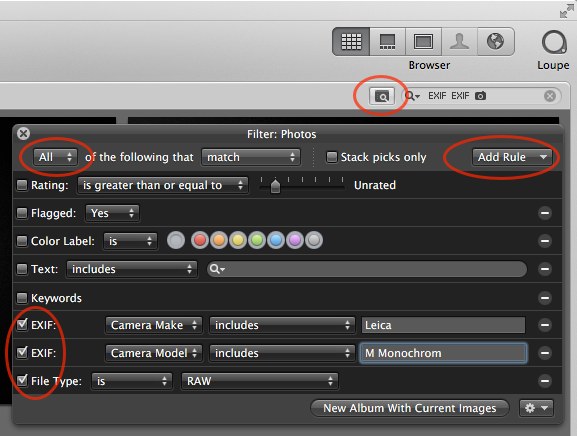 These powerful search tools will let you locate any images in your library
In the screenshot above, using two EXIF rules (you can add additional, even duplicate rules, from the Add Rule menu), I'm searching for Camera Make includes “Leica” and Camera Model includes “M Monochrom”. I also added the File Type is RAW criteria, since I didn't want to look at any JPEGs shot on that camera. Don't forget to set the search criteria to All and not Any, or you'll find way more images than you're looking for!
(Yes Leica M Monochrom support came way back in the Camera RAW update 4.08, but it's what I had here to show these examples!)
By the way, you can copy and paste the exact camera make or model name by selecting one of those unsupported files, and as in the screenshot below, under the Info tab, selecting EXIF Info, then finding some unique identifier for that camera. The camera model should certainly do it!
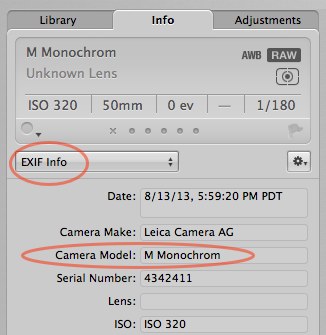 The Info tab has preset options of metadata to show you, and EXIF Info will reveal all kinds of technical data on your image, camera, lens and more
If you were shooting RAW+JPEG…
If you'd been shooting RAW+JPEG with an unsupported camera, you may have been importing as RAW+JPEG Pairs, and setting the JPEG as the Original so you could work with your photos while you waited. You'll know that's the case if you see this little J in the box on the bottom-right corner of your photos.
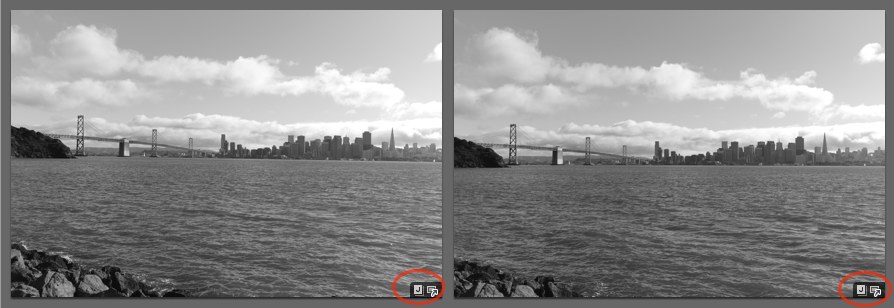 That tiny J means you’re looking at the JPEG of a RAW+JPEG pair
To swap to the RAW view, choose the menu Photos > Use RAW as Original, and the RAW and JPEG will trade places. The RAW will reprocess immediately, and if you'd made any adjustments to the JPEG (cropping, exposure, etc.), those will still be applied to the RAW file.
It's nice to get updates
While it'd be great to always have support for the newest cameras the moment they are released, it's also good to know that there are workarounds while you wait. Shooting RAW+JPEG is my preferred way to do this, and when the time comes, as you can see it's easy to reprocess all those old photos!
