Using Aperture 3 to Prepare Time Lapse Frames
Personally I've only ever made a few time lapse movies, and honestly just never got that into it. But I just came off a job (recording two new video training courses for lynda.com, yay!) and the crew is really, really into time lapse. I jokingly suggested they watch this movie (which is probably a very insensitive film to many people, so unless you have the stomach for disrespectful humor you may want to skip it… fair warning? OK, here): “Intervention” by Cristina Valdivieso & Jon Connor.
Anyhow, I got into the game. Why not; we had lots of time to kill waiting for light to change, and a truckload of cameras (literally), so I made a few. My favorite so far is of the Las Vegas strip, going from dusk to dark. You may have seen it on Instagram already, which is actually what inspired this post.
Creating a time lapse is, at it's core, just a series of still images taken at regular intervals (once per second, 10 seconds, minute, hour, day, whatever) over an extended period of time, then strung together as a movie, creating a time-compressed effect. You can watch flowers bloom, buildings construct, ice shelfs melt; all kinds of things.
A movie could be made of up hundreds or even thousands of frames (individual photos). That's a lot of photos to edit! Unless, of course, you're using Aperture.
Tens of thousands of photos, oh my!
Since every frame is going to need essentially the same edit (barring any sudden changes in the environment you need to compensate for), you should be able to do whatever edits you want to one photo, then lift and stamp that effect to all the others. Exposure, cropping, vignetting, whatever you may want. Even retouching; if you have sensor spots showing up in the sky, you probably don't want to retouch 20 spots on 10,000 photos. Eek!
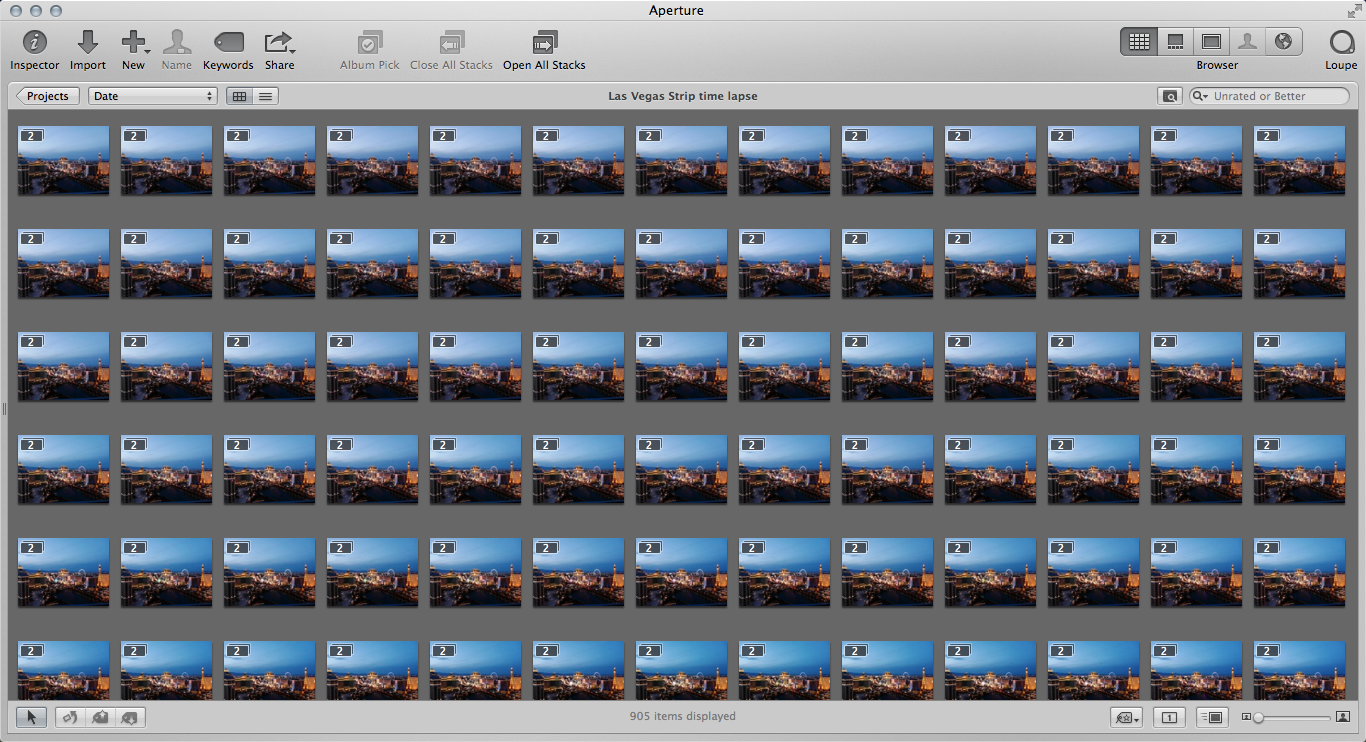 You don’t really want to have to retouch all of these individually, do you?
Let's talk about retouching sensor spots first. Using Scott's awesome technique for finding hidden sensor spots using a sine-wave curve, locate and eliminate every nasty sensor spot you can find. You may want to spot check a few shots further down the line though, in case changes in exposure or environment reveal additional spots. Also, if you have objects moving through the scene, you'll need to consider that a big soft heal spot may work fine on a big blue sky, but if something detailed moves into that space in your image, the retouching spot may do more harm than good.
Do you need to make any changes to exposure, white balance, saturation, etc.? Again just because a setting works on one photo, it may not be appropriate as the light changes. A time lapse that goes from day to night, as this one here does, may not benefit from a universal white balance shift. Again, try and test.
Vignetting is a common one to apply. One of the big benefits of using Aperture for this is that it's easy to create multiple crops, and if you vignette on a 16:9 crop, then change the crop to square, the vignette will wrap with it. Just again be aware that the settings may need to change for the different crop ratio to look their best.
Cropping is very likely going to need to happen. If your camera shoots in a 3:2 or 3:4 or 4:5 ratio, odds are you're going to want to crop for HD video, so a 16:9 ratio. I would advise not to be tempted to just set the camera to 16:9 to shoot, because that'll reduce your options later. Shoot full frame, and just keep in mind when framing the shot how you're likely to crop later. It's nice to have more options, not fewer, when it comes time to edit.
Lift & Stamp is your friend
Once you've applied all these basic settings to a single image — exposure, color shifts, retouch, vignette, crop, etc. — you can lift and stamp them to the rest, all at once. It's really easy to do.
First, select the image you've already retouched (you may as well switch to the Browser, or thumbnail view), and click the Lift button.
 Switch to browser view to see all your images at once, select the adjusted image, and click the Lift button
The Lift button copies to a special clipboard all adjustments and metadata applied to that image. The Lift & Stamp HUD (Heads Up Display) will pop up as soon as you click Lift, showing you what's been copied.
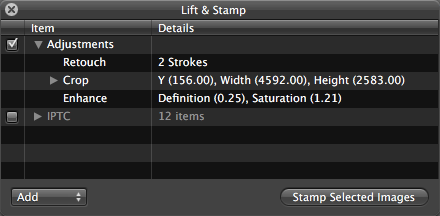 Retouch, Crop and Enhance have all been copied to the Lift & Stamp “clipboard”, and IPTC data as well, although we don’t need that
As you can see in the screenshot above, the lifted adjustments include Retouch, Crop and Enhance. It also lifted IPTC data, but I don't need to stamp that across all images, as it's already there. To disable a category, just un-check the check box.
BONUS TIP: Did you know that you can remove a single adjustment from the adjustment list in the Lift & Stamp dialog? Just select any one, for example Crop, and hit the delete key on your keyboard!
To stamp the adjustments across all the rest of the images, first you have to select them. You could select all, then deselect the one you started with, or just select the handy Edit > Invert Selection menu, to swap what's selected.
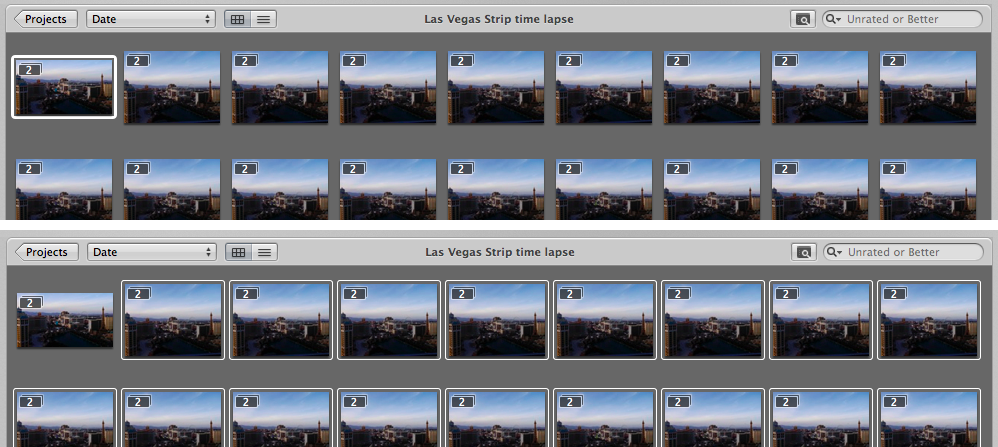 From one selected to all-but-one selected, using the Invert Selection command
Now, you're ready to stamp! The HUD should still be open, but if you accidentally closed it, you can open it again by tapping Shift-O or shift-clicking on the Stamp button (it's just to the right of the Lift button). Notice that from the HUD you can choose to Stamp Selected Images, and also notice that you can choose to Add or Replace settings. This will either add your adjustments (and metadata) to whatever is already there, or replace all existing adjustments. So if you've done specialized retouching to individual images, you'll want to be sure to choose Add, or you'll overwrite your previous work. If you haven't done anything to the other photos, then it doesn't matter which you choose.
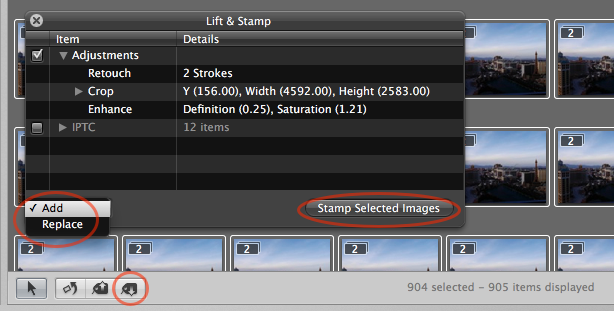 Time to stamp!
Or, don't worry about the HUD at all. If you've already made any changes needed to it, just click the Stamp button and off it'll go.
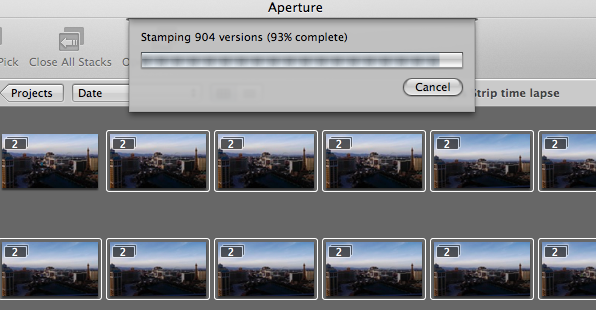 Progress! 904 images retouched in record time
From there, you're ready to export. But before we get to that…
Multiple versions for multiple time lapse videos
You may have been wondering why all my thumbnails have a [2] on them. That tells me each one is part of a stack of two images. Why, you ask? Because I made a duplicate version of every image so I could crop differently for another output — namely, Instagram.
In your workflow, you would likely do all the retouching first, then duplicate versions for different outputs. The only reason your'e seeing it already done is because I'd done this work before writing this tip. But let's pretend I'm now ready to create a whole new version of these images.
This is where Stacks, and especially Album Picks, become very very useful. Here's the steps.
- Select all of your images for the time lapse. They may already be in an Album, or not. Doesn't matter.
- Create a new Album. You can choose the menu File > New > Album or hit Command-L.
- In the dialog that pops up, name it appropriately, and be sure to leave “Add selected items to new album” selected, and hit OK.
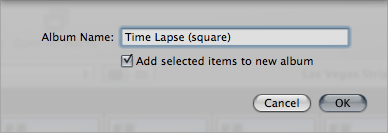
- Select all the images in your new Album, and choose from the menu Photos > Duplicate Version. This will create a new version of each photo, and automatically make it the Album Pick.
At this point you'll have a series of stacked images. If this is the first time you've done it, you'll now see the [2] on each thumbnail. In my case, since I'd already done this before, now I have three versions in each stack.
 I have three versions in each of my stacks
Now, open up that first image, and change your crop. In this case, I cropped square for Instagram.
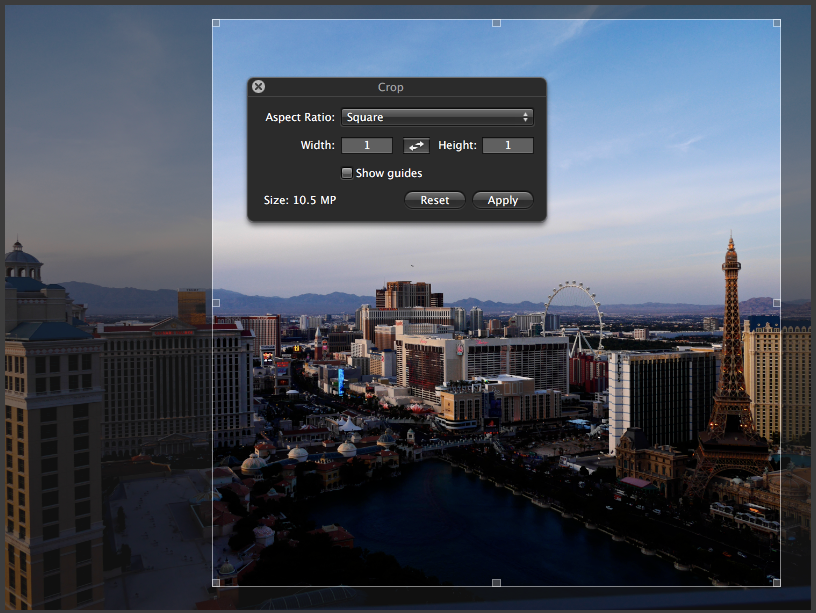 Cropping square for Instagram
Once you're satisfied with your crop, and made any other changes you might want to do (is that vignette overpowering now? Check it!), just Lift & Stamp as before.
Why does this work?
If you're not familiar with Stack Picks and Album Picks, you may be scratching your head at what just happened. Here's the run-down.
A stack can be a collection of similar photos or of duplicate versions of the same photo. In this case, it's duplicate versions. Every stack has a “stack pick”; that's the “best” of the collection, or the one you want to see when you close the stack.
If you put an image into an album, you still have a stack pick, but you can also have an “album pick”. The album pick is basically a stack pick but only when viewed in that album. Imagine you wanted a black and white collection of your photos. You put images that you want to convert to B&W into an album. Before changing them to B&W, which would change them everywhere they were already used throughout Aperture, you create a new version first. As long as the preference “Automatically stack new versions” is enabled, when you create a new version in an album, that new version automatically becomes the album pick.
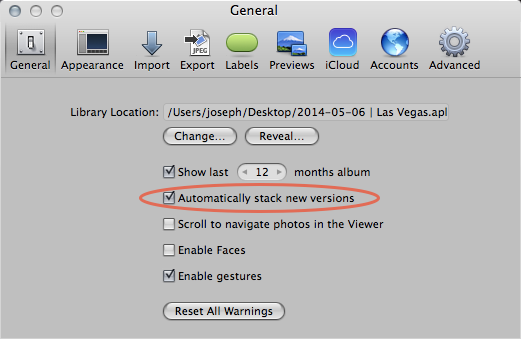 Be sure to enable “Automatically stack new versions” in the Aperture preferences
Close the stack, and that's the version you'll see. Go to another album, and that new B&W version won't be the pick — it's still in the album, inside the stack, but it's not on top. Cool, huh?
Time to export
Once you've done all the cropping and retouching you need, it's time to leave Aperture. Select all of your images and go to File > Export > Version… and pick an appropriate preset. If you haven't made those yet, you can do it from the Export dialog; just choose Edit under the Export Preset drop-down.
For my 16:9 outputs, I created a preset called JPEG – 1080p Q8 to indicate that it'd fit within 1920×1080 and was at JPEG quality 8. For the Instagram, I made it JPEG – 640 Q8, to fit within 640×640. I choose 640 because that's the width of the iPhone, but honestly I don't know what the max resolution is of videos on Instagram. I should probably look that up. (If you know, let me know in the comments please!)
 This preset is set up to create 1920×1080 frames
Now you'll have a series of JPEG files at the appropriate size in a folder on your desktop.
Assembling the time lapse movie
To create the time lapse movie, I use the donation-ware app Time Lapse Assembler. It's straight forward, and very easy to use. You could of course use something like After Effects, or Final Cut Pro X, or any other number of tools as well. If you wanted to add titles and music, you'll need to use an editor. Actually, you could import your movie back into Aperture, and using the slide show tool, add titles and music. Cool!
The final time lapse
Here's the time lapse assembled from the above 900+ images. You can see the square one on Instagram as well. Aaaand another one I just did, because this is cool. And no, I haven't added any music.
More like this
- Tip
- Tip
- Tip
- Forum
- Forum

Comments
on May 18, 2014 - 8:50am
I’m using Aperture to develop raws for timelapses for about a year now (using methods described in this article). Is there any way (plugin maybe?) to change some parameters gradually? Changing white balance from daylight to tungsten (dusk scenes with artificial lighting) is often needed. I know it can be done manually (changing the value slightly each frame), but I’m looking for a more automated method.
on May 18, 2014 - 5:06pm
@PhotoJoseph
— Have you signed up for the mailing list?
on May 20, 2014 - 3:15pm
I wish something like that existed for Aperture! There is software out that that can for it for Lightroom: http://lrtimelapse.com
I used to deflicker time-lapses manually by going through time-lapses and manually shifting the exposure in Aperture, but that get old quite fast. I also used After Effects with GBDeFlicker which gave quite nice results. Im currently looking into Sequence, which can also do deflickering, however, that also seems fairly limited at the moment..
If someone can come up with soemthing that works well with Aperture, I’d love to hear about it!
on May 25, 2014 - 12:11am
I use Aperture’s slide show feature to build my time lapse sequences. It’s a lot easier than using an external editor. Give it a go.
on May 25, 2014 - 12:52am
@PhotoJoseph
— Have you signed up for the mailing list?
on May 25, 2014 - 7:09am
Can You write something about it? Currently I’m exporting all frames to .png and then make the animation in Quicktime Pro. Maybe there is an easier method…
on May 25, 2014 - 7:53am
The shortest time between slides that can be selected is Aperture is 0.1 seconds (10 fps). You can easily apply that to all photos. When you then export the movie you also have to choose a frame rate, if this does not match the chosen interval Aperture seems to simply reuses or skips frames, no frame blending occurs (Transition: None)!
According to Apple the exported slideshow uses image previews when exporting the Slideshow. I do not use Previews, and none seems to have been created when I exported a slideshow. Without the previews the export works fine, but the quality is also not perfect (I exported to HD), I suppose Aperture uses Thumbnails (1024x1024) when there are no Previews available.
So to test this I created some super low quality previews, those indeed showed up in the slideshow preview in Aperture. However, when I exported it I just got a black movie! Apperantly some bug exists there.. After restarting Aperture and recreating the slideshow the export worked fine. The quality was much worse than before. Because thumbnails are better quality than bad previews.. I normally set the ‘Photo Preview quality’ to max, because that setting is also used for Thumbnails, even though I do not use Previews.
Then I created the highest quality Previews and exported the movie. The quality was indeed much better than with the low quality previes and the high quality thumbnails.
So, the export options are fairly limited, especially the framerate. And you need to have high quality Previews enabled/generated to get a good quality movie. Once you have the previews you can also easily drag them to the Finder and use Quicktime 7/TimeLapse Assembler or something like that to create a movie with a bit more options.