ON1’s Quick Mask and Refine Brush
ON1 Masking Overview
ON1 Photo 10 has a solid set of masking tools that are available in both the Layers and Effects modules. There is the standard Masking Brush for freeform brush strokes, including the Perfect Brush mode that enables edge detection. The Masking Bug creates smooth gradient masks in a variety of shapes. There is also a Blur Tool and a Chisel Tool to fine tune masks.
The most unique masking tool ON1 offers is the Quick Mask. You just give the Quick Mask a hint about what you want masked with a lazy brush stroke. The Quick Mask analyzes the area brushed and makes an intelligent decision about what you want masked. It isn't perfect, but that's where the Refine Brush comes in. It does what its name suggests — refines a mask. The Refine Brush improves a mask, building upon areas already masked. When used together, the Quick Mask and the Refine Brush makes elaborate masking jobs simple.
A dull sky needs color
Let's look at a real world example. In this photo, I want to increase the blues in the sky. I apply a Color Enhancer filter in Effects to boost the vibrance and blue saturation. The sky looks better but the background mountains are too blue now.
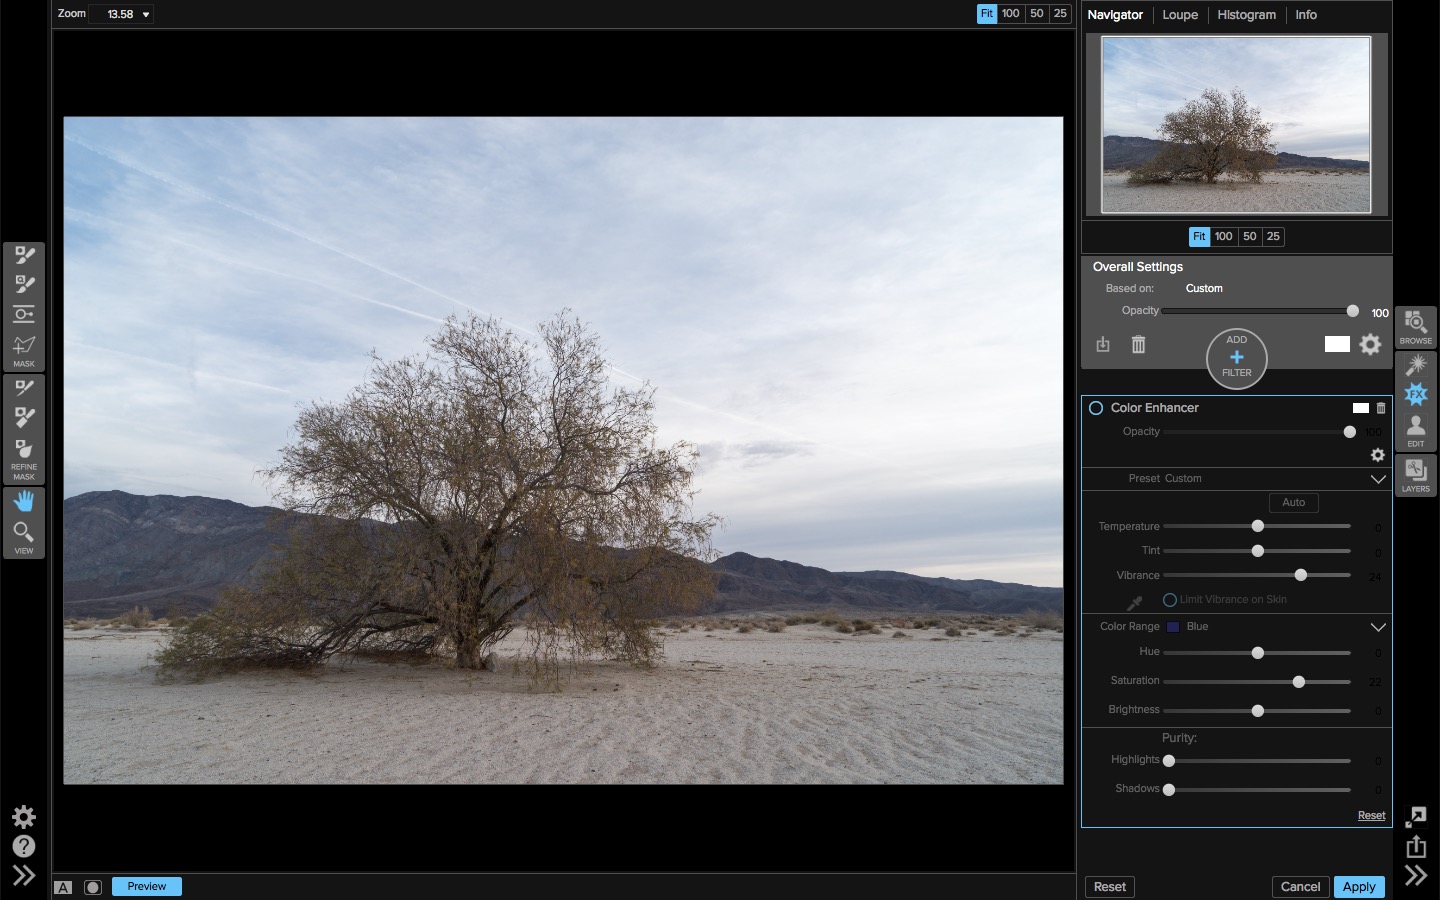

I could use a gradient mask and remove the blue adjustments from the lower half of the photo, but it won't be precise. Either a few tips of the mountains will get the saturation boost or a few patches of the sky won't get the saturation. The best approach is to put in the work and create an intricate mask so the color enhancements only affect the sky. As you'll see, “the work” isn't all that much.
Masking the sky
I'll use the Quick Mask and Refine Brush to quickly mask away the color from the sky because the sky is a reasonably uniform tonal area. Once the sky is isolated, I'll invert the mask leaving the sky with a nice boost of blue. First, a simple, lazy swipe of the Quick Mask.
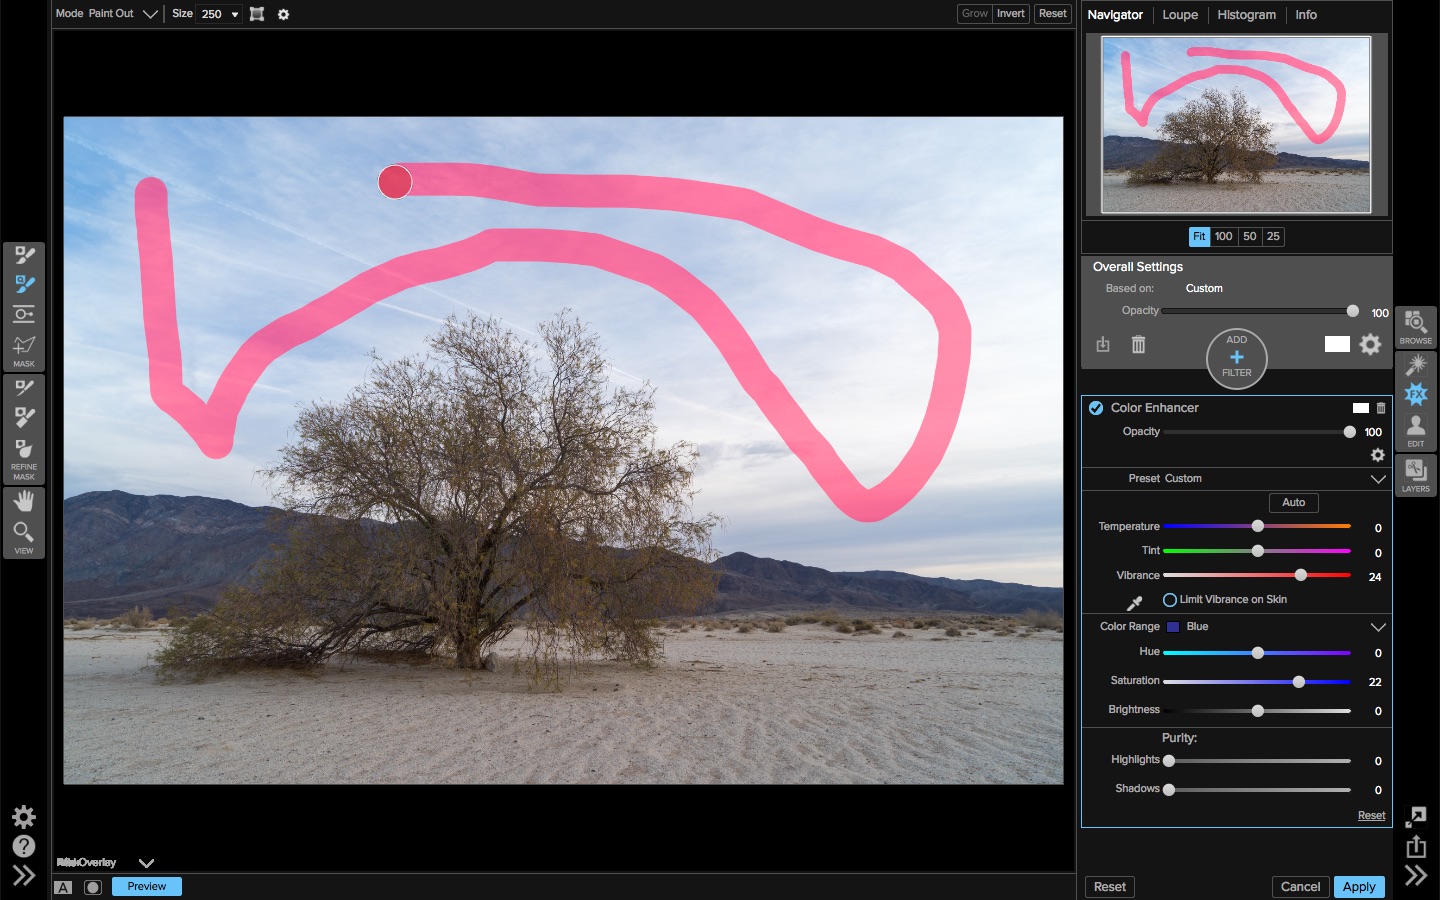 A lazy brush stroke with the Quick Mask
Which turns into this…
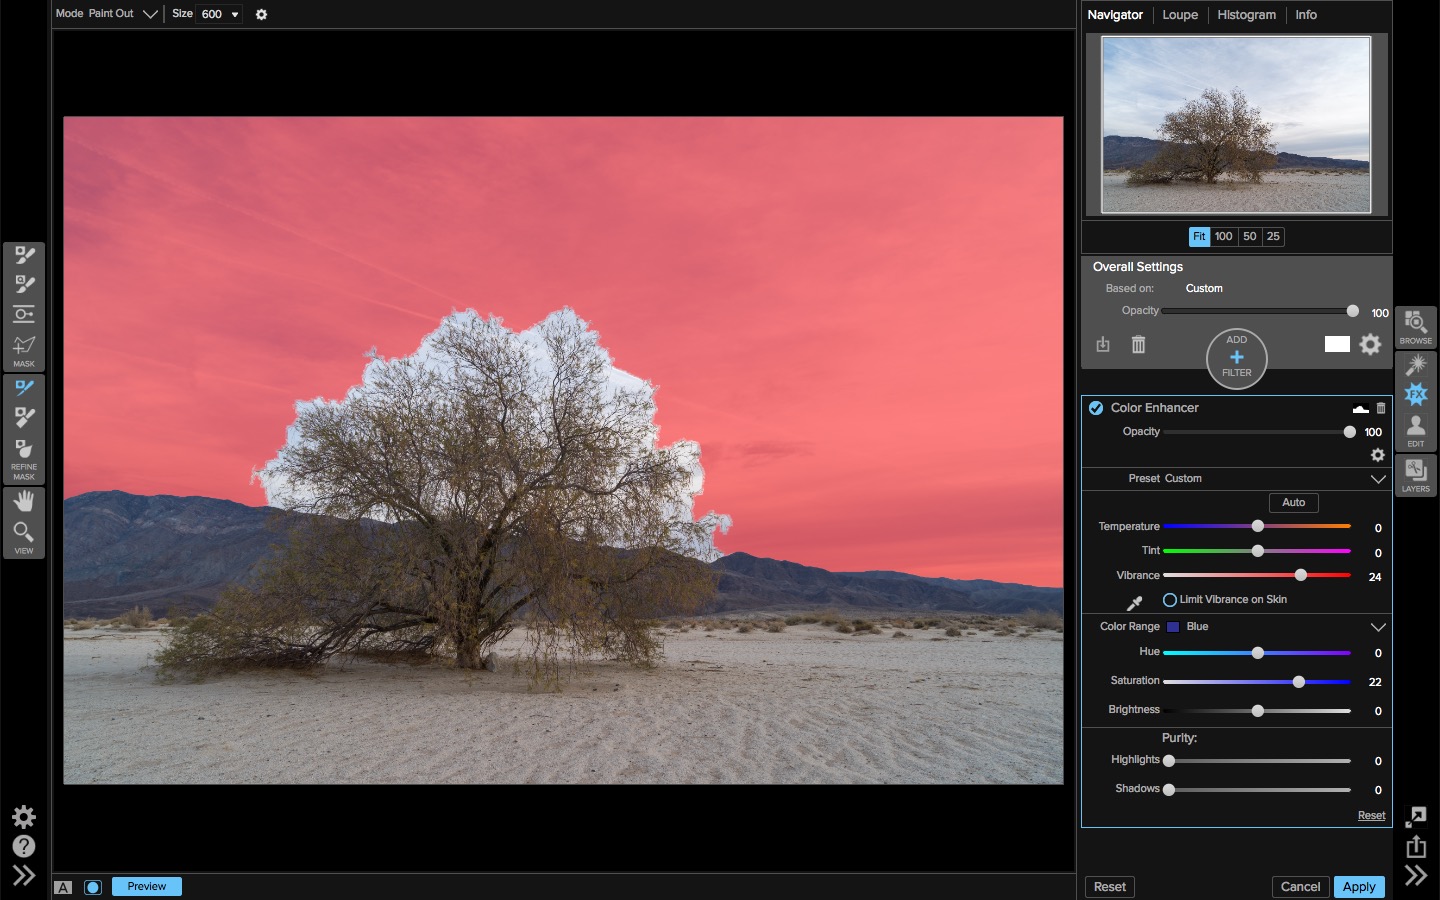 The resulting Quick Mask
The Quick Mask does a great job isolating the sky and the edges along the mountain range looks very good. It doesn't weave in-between the branches of the tree, though. This is where the Refine Brush comes in. Using the Refine Brush, I paint over the tree.
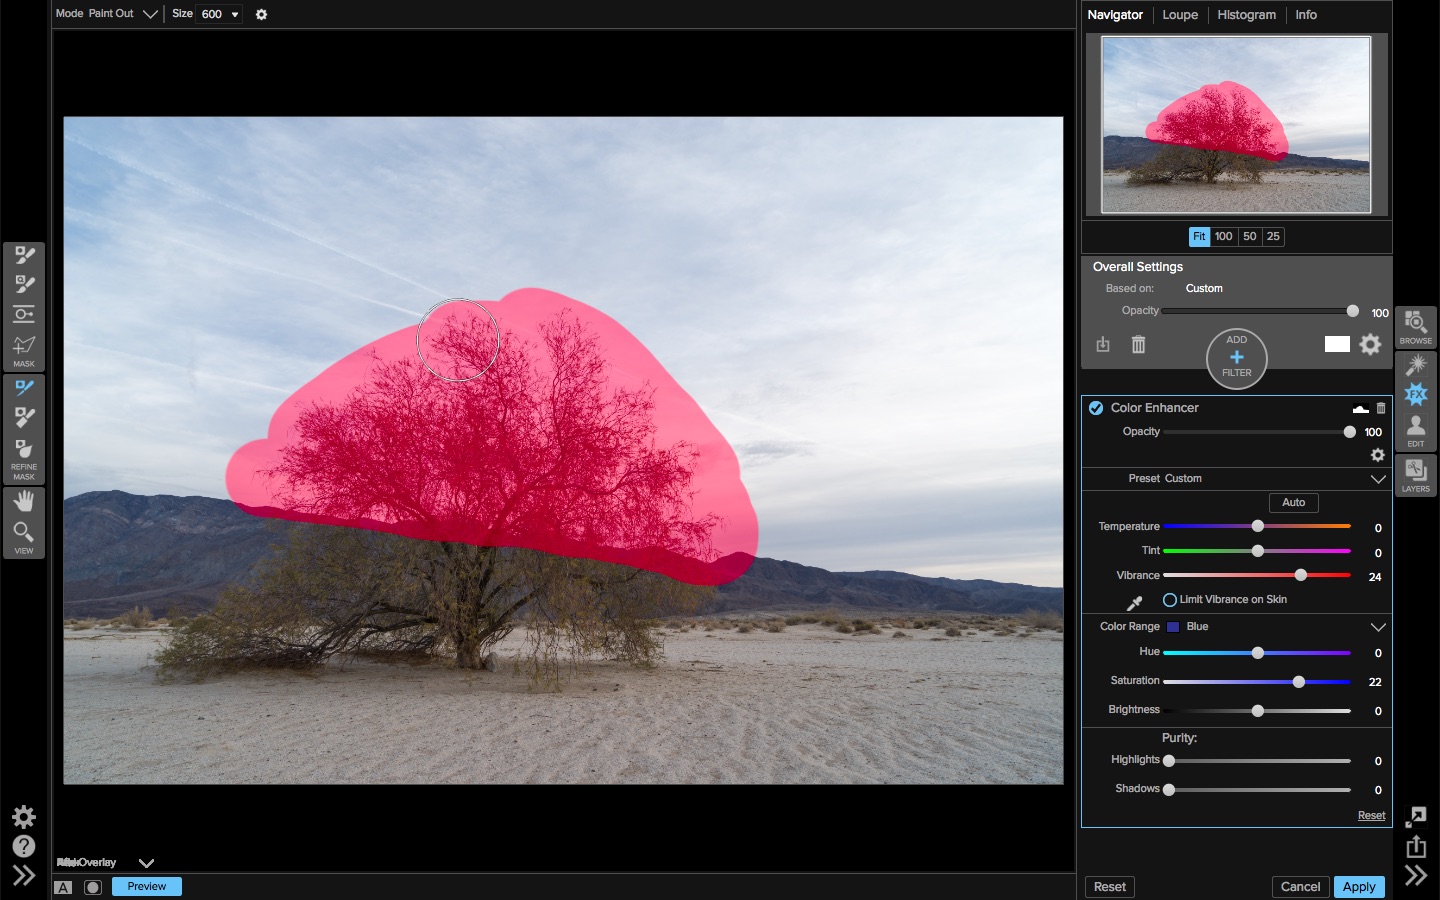 Applying the Refine Brush
Which becomes this…
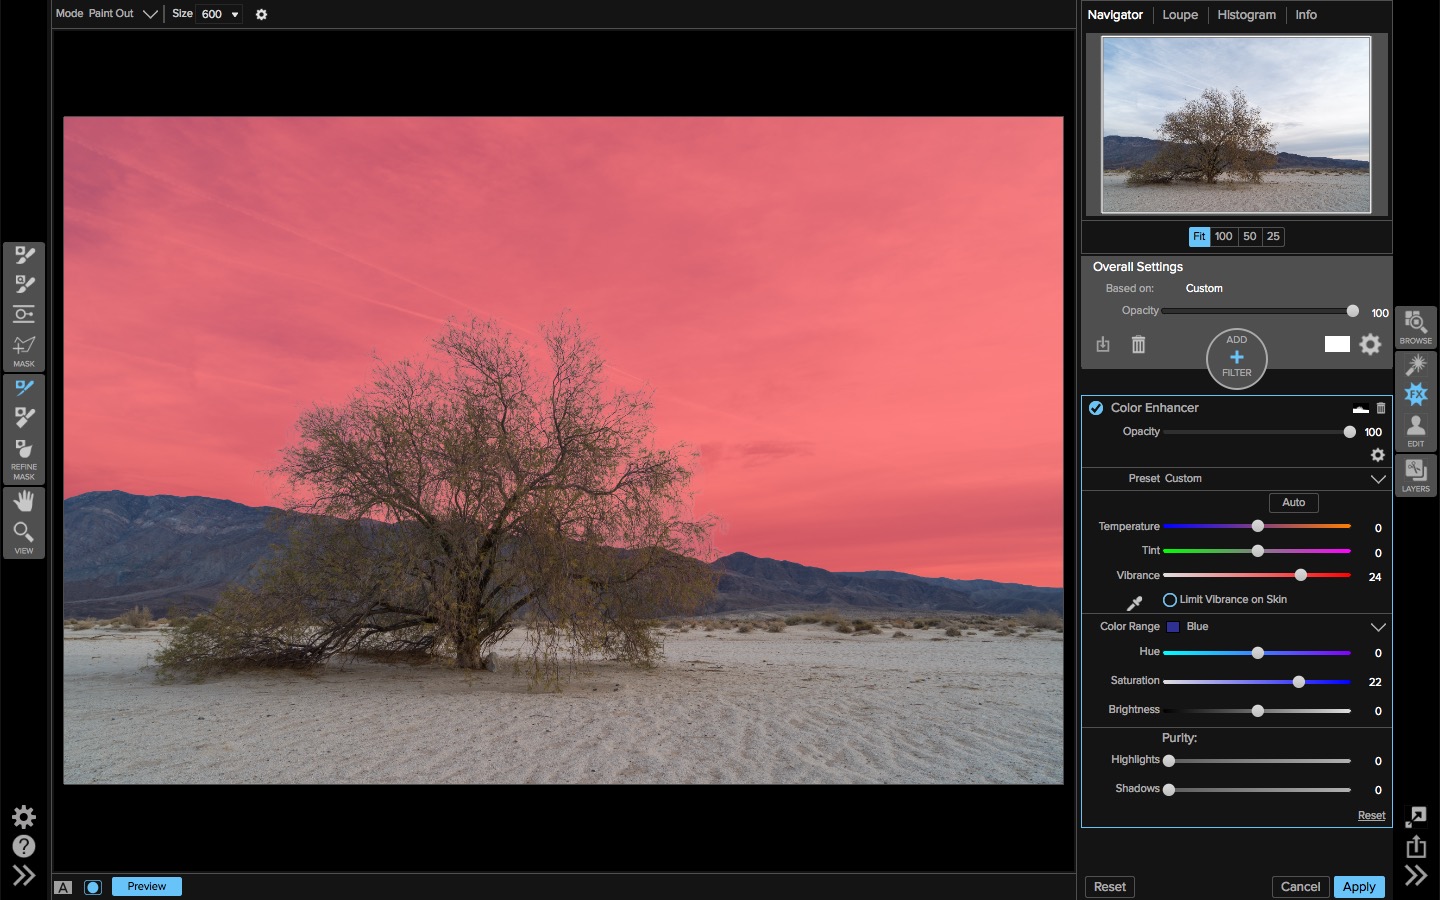 The improved mask after the Refine Brush is applied
The Refine Brush strokes are coarse and do not need precision. The brush considers the existing mask and the tones already masked, and extends the mask accordingly. The Quick Mask and the Refine Brush are a powerful one-two punch to quickly make a mask. The proof in the mask is zooming in at 100%:
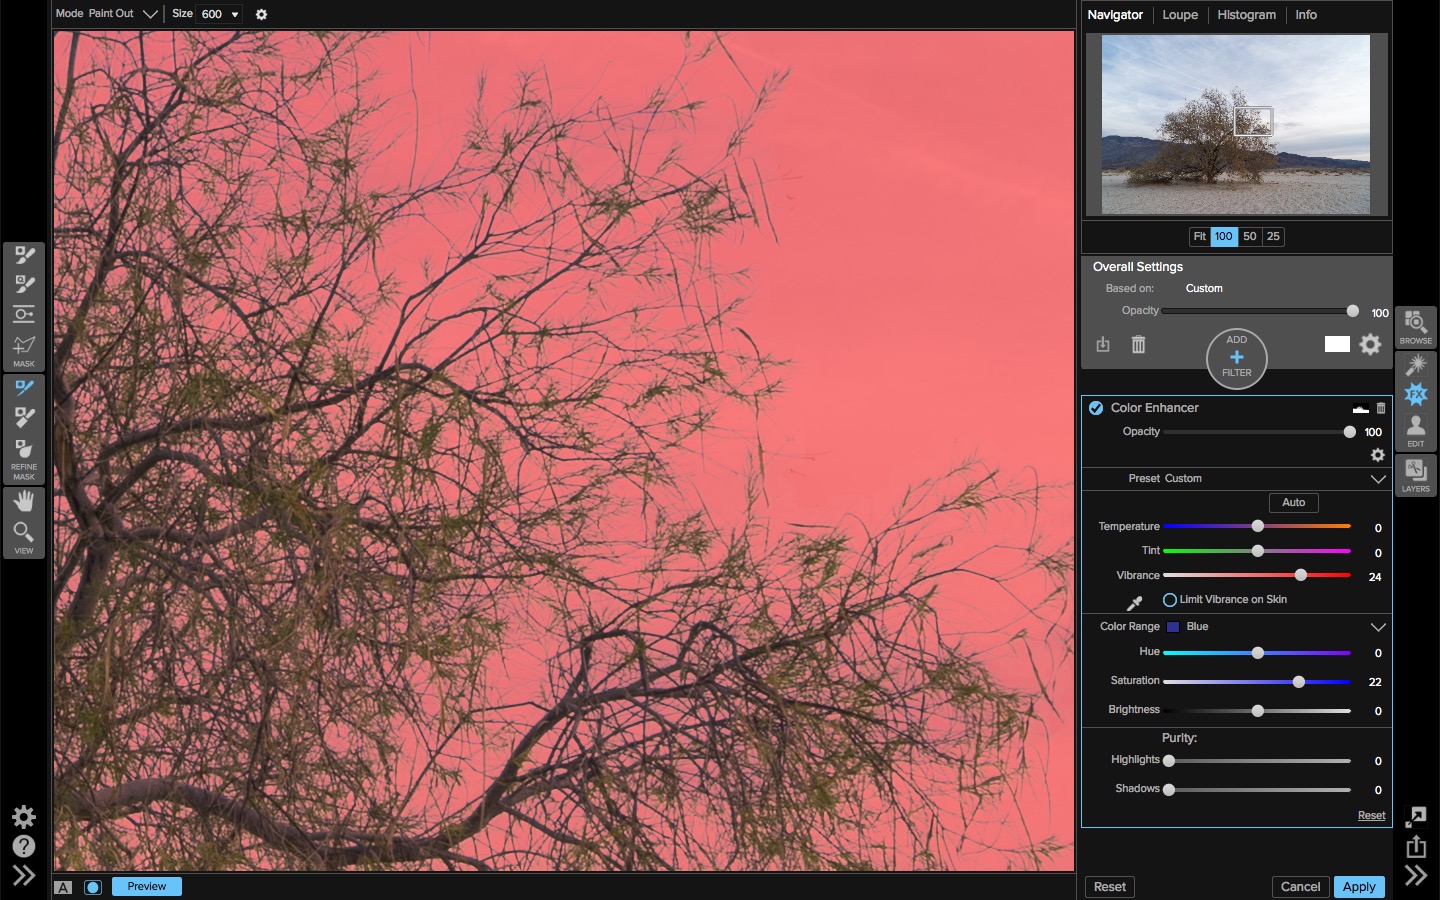 Zoomed in view of the mask around the tree branches
Masking this level of detail with a masking brush, even with edge detection or color sampling, would take a significant amount of time. Using the Quick Mask and the Refine Brush, I created this mask in about 60 seconds.
Finishing up
At this stage, I've masked the blue enhancement away from the sky – the exact opposite of what I want. Using the Mask > Invert Mask menu option, the mask is flipped and the boost in the blues is only applied to the sky.
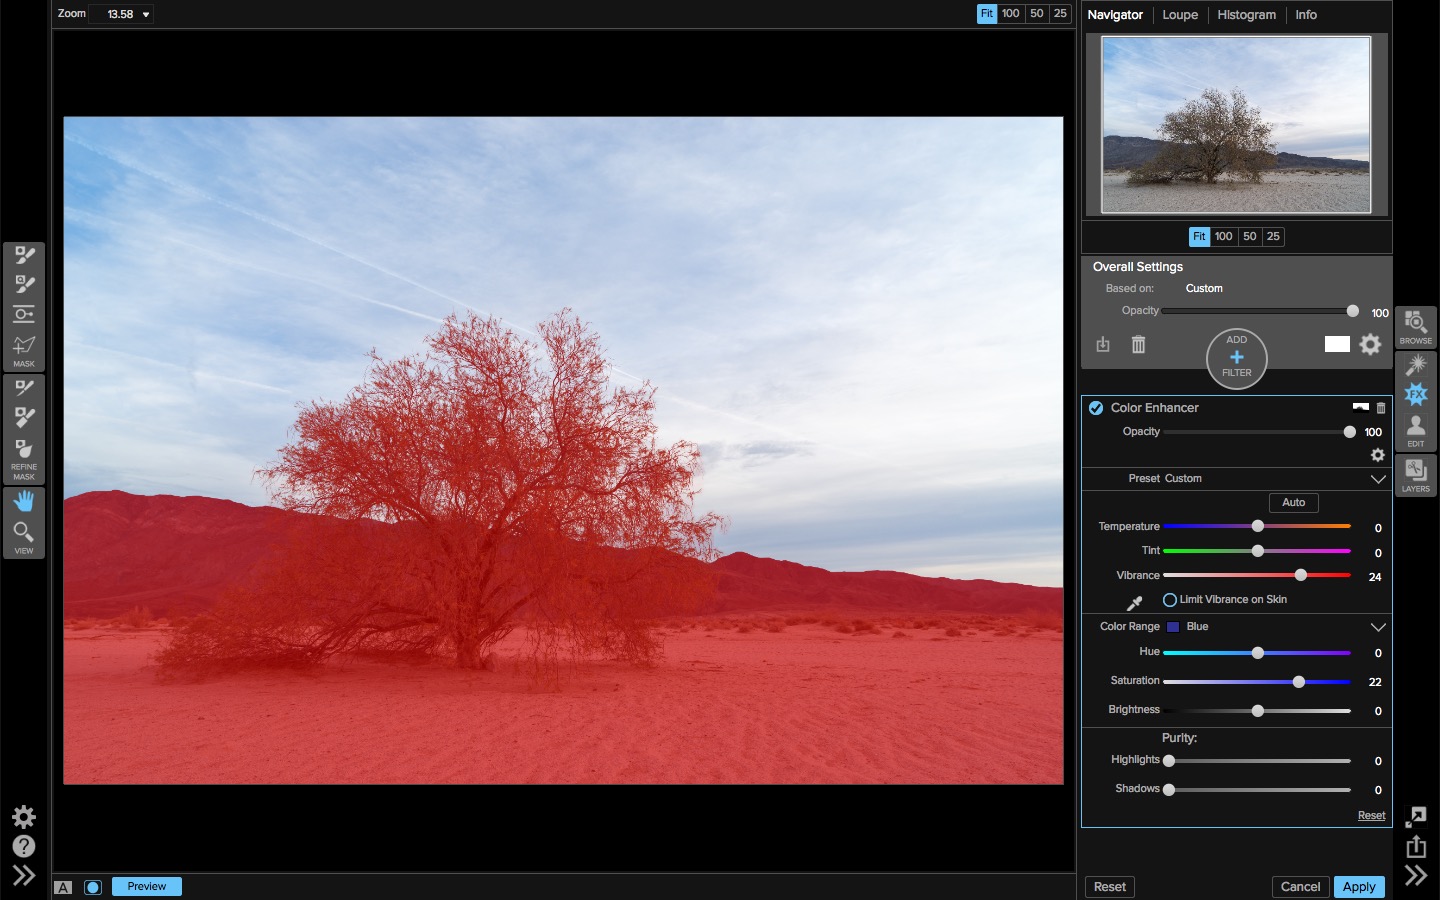 Invert the mask
And now, the Color Enhancer is applied only to the sky!


Closing thoughts
OnOne Photo 10's Quick Mask coupled with the Refine Brush makes complex masking simple. The Quick Mask also has a “box” mode which is useful for isolated subjects on a uniform background, such as green screens. You literally draw a box around the subject and let the Quick Mask do the rest.
I've shown the tools in the Effects module. They work the same way in the Layers module as well. When working with PSD files, masks created in ON1 Layers transfer to Photoshop, too!
