Freezing Motion In Long Exposures
Overview
Long exposures make for very beautiful landscapes. Cityscapes, too. The sense of motion and passage of time is especially poignant when there is a firm, stationary subject in the photo. What do you do if your subject is moving, too? I had this exact situation shooting at a harbor not too long ago. With a little planning during the shoot, noise reduction software, and some basic work in a layering tool, you can the best of both worlds – the smooth, silky surfaces of a long exposure with a crisp subject.
In this article I am using Lightroom for noise reduction and on1's Perfect Photo Suite 9.5 as my layering tool. You may have different noise reduction and layering software, and that's fine. The technique I describe works for a variety of tool chains.
Planning the Shoot
When shooting, you need two images of the same scene. You're already shooting a long exposure, which means you have your tripod, right? Frame up your composition and take your long exposure. In this shot, you want to get your color, tone, and exposure the way you like it.
Here I have a 40 second exposure of the harbor in Oceanside, California.
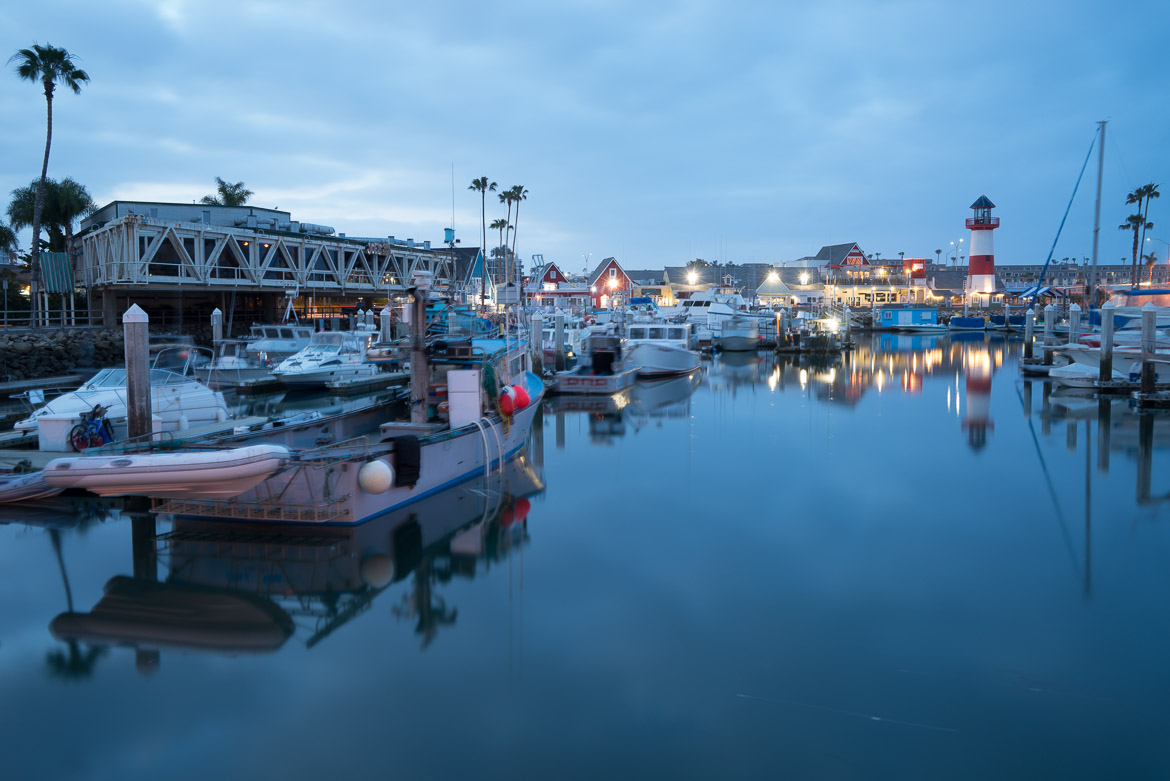 40 sec, ISO 50: Boats are blurry because they bob about in the water
Next, without moving your tripod, increase the ISO and take the same shot. Increasing the ISO will increase the camera's sensitivity to light and therefore reduce the exposure time. A shorter exposure will freeze motion. I recommend targeting an exposure time of ¼ second or less. How much or how little blur you can tolerate will depend on how vigorously your subject is moving.
You will probably need to experiment with the ISO setting until you freeze the motion to your liking. If you're in doubt, take a range of higher ISO frames – digital is cheap – and select the best one when you're post processing. On this shoot, I took frames ranging from ISO 800 to ISO 3200.
In the end, I settled on this shot taken at ISO 2000. The exposure was ¼ second and that was OK for me.
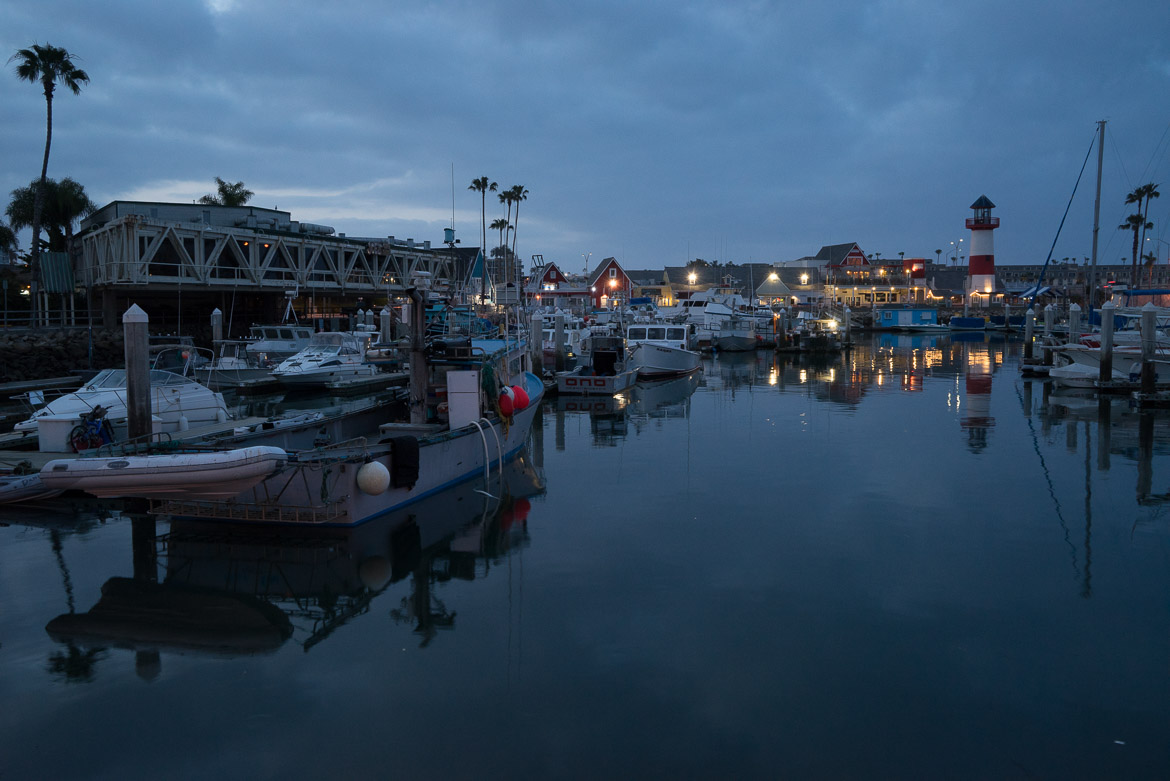 1/4 sec, ISO 2000: Boats are frozen, frame is dark but not underexposed
The higher ISO frame is dark and I will deal with that in post processing. I could have chosen an even higher ISO shot that is brighter, however the noise was also more prominent in that shot. And yes, the high ISO shots will be noisy. That's where the noise reduction software comes in. We will get to that soon.
Do not use a wider aperture to reduce the exposure time (i.e. switching from f/11 to f/4). Changing your aperture will certainly shorten the exposure time. It will also change the depth of field and make some areas of the photo softer than others. This will be problematic when blending photos in your layering software.
Processing the Long Exposure
Begin by processing the long exposure. At this stage of the processing, spend your time on the basics. White balance, black point, white point, exposure, contrast, and so on. Make sure the areas of the photo that are accentuated by the long exposure are the way you want them. In this photo, I concentrated on the water and the sky.
Here are the basic adjustments I made in Lightroom.
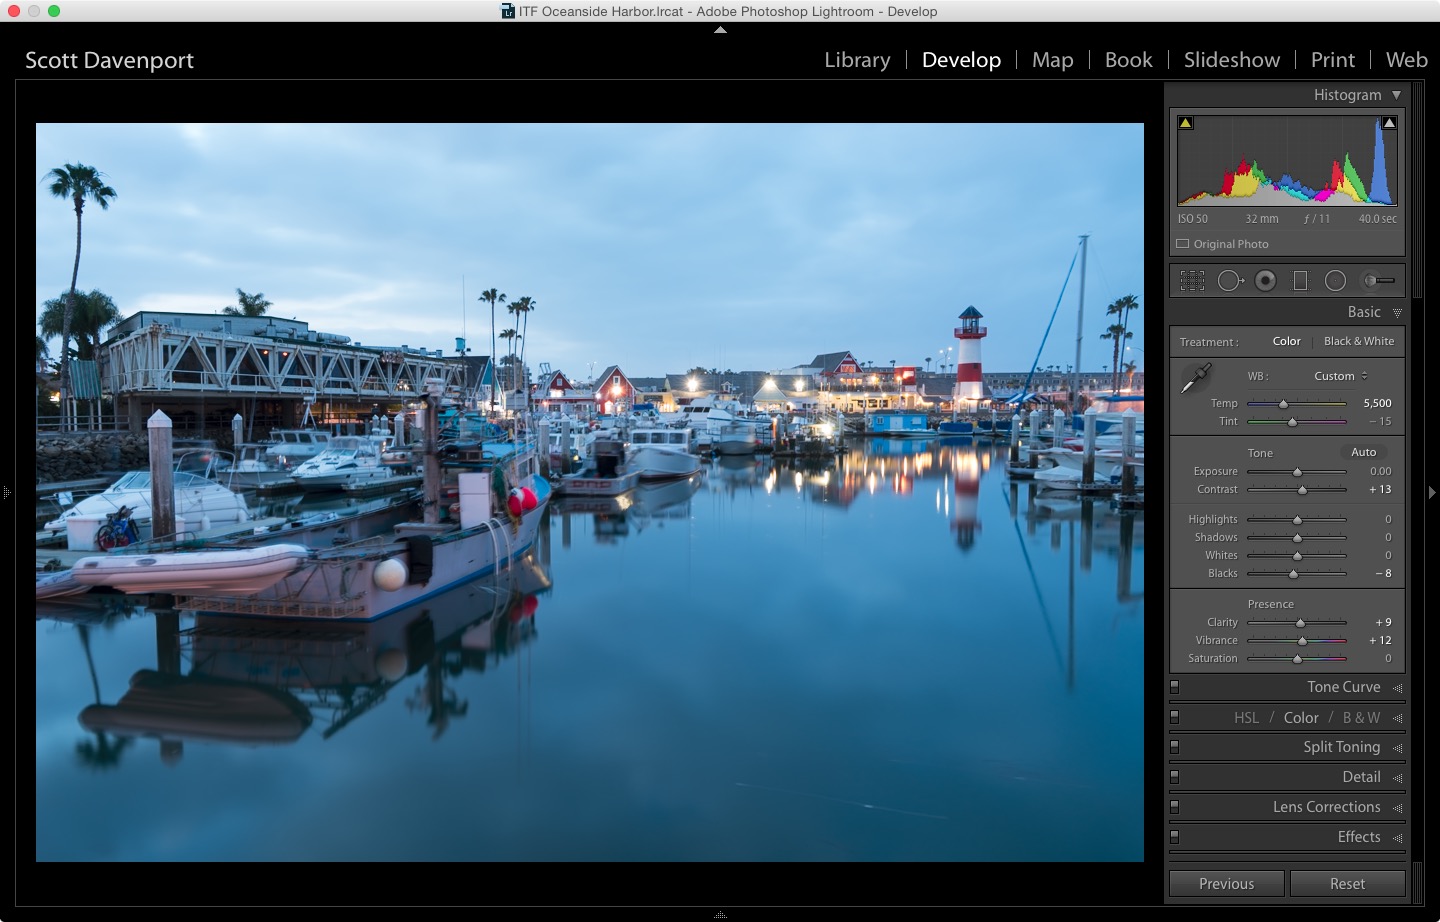 Long exposure with basic adjustments applied
Before moving on to the high ISO photo, make a note of the white balance settings. Also, make a mental note of the histogram.
Processing the High ISO Frame
Set the white balance the same as the long exposure. Next, adjust the exposure so the histogram of the high ISO frame is similar to that of the long exposure. It does not need to be a perfect match – and probably won't be so don't kill yourself trying. Aim for something that is reasonably close.
Note: I did experiment with Lightroom's Match Total Exposures feature, however I wasn't pleased with the results for this image.
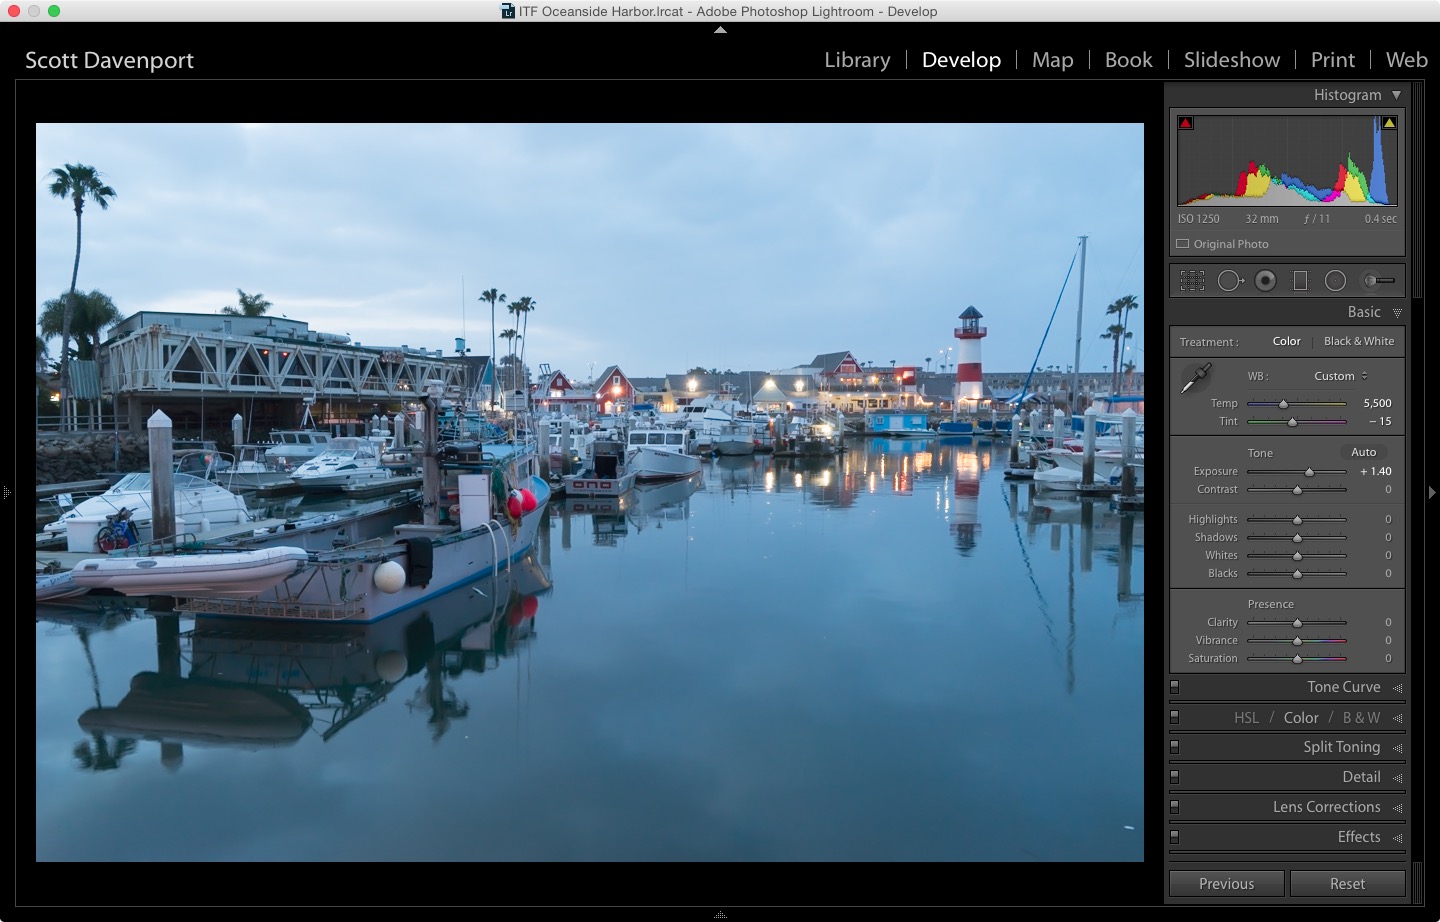 High ISO image with white balance and exposure adjustments
Next, zoom in to 100% and you will likely find a lot of noise. Use your noise reduction software to address. I used Lightroom's noise reduction to clean this up.
 High ISO photo before noise reduction
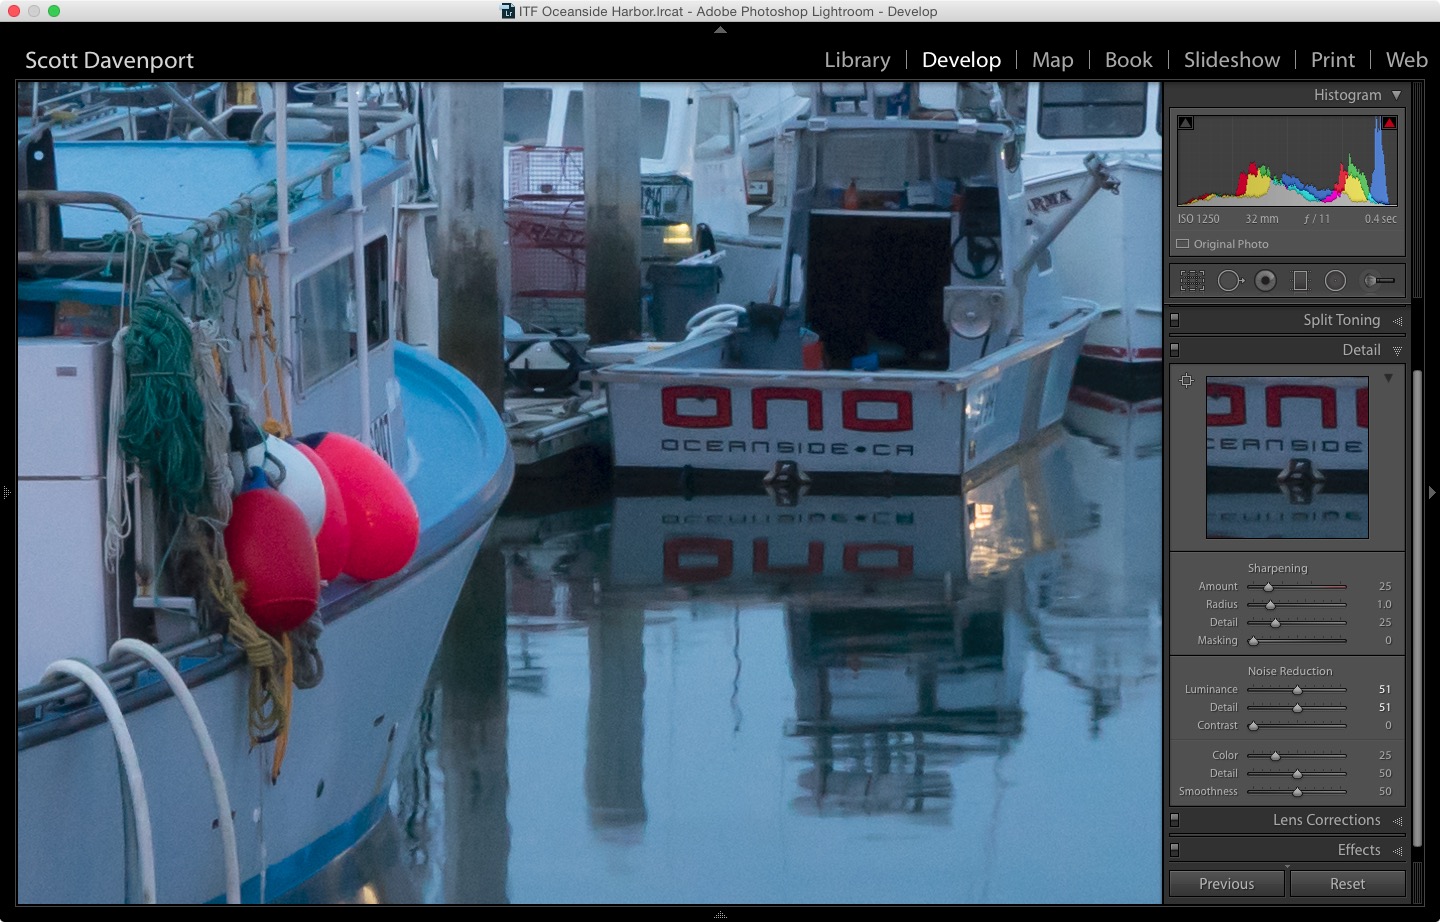 High ISO photo after noise reduction
Masking the Two Together
Ok, now for the magic! Open both images in your layering software and position them so the long exposure is on the top layer and the high ISO image is on the bottom layer. Select the top layer and use a masking brush to hide the blurry subjects in the long exposure and reveal the sharp subjects in the high ISO image. In Perfect Layers, I used the Masking Brush with an opacity of 100% and a small feather. Take your time and pay attention to detail. For this shot of the harbor, I needed to mask away not just the boats but the blurry antennas as well.
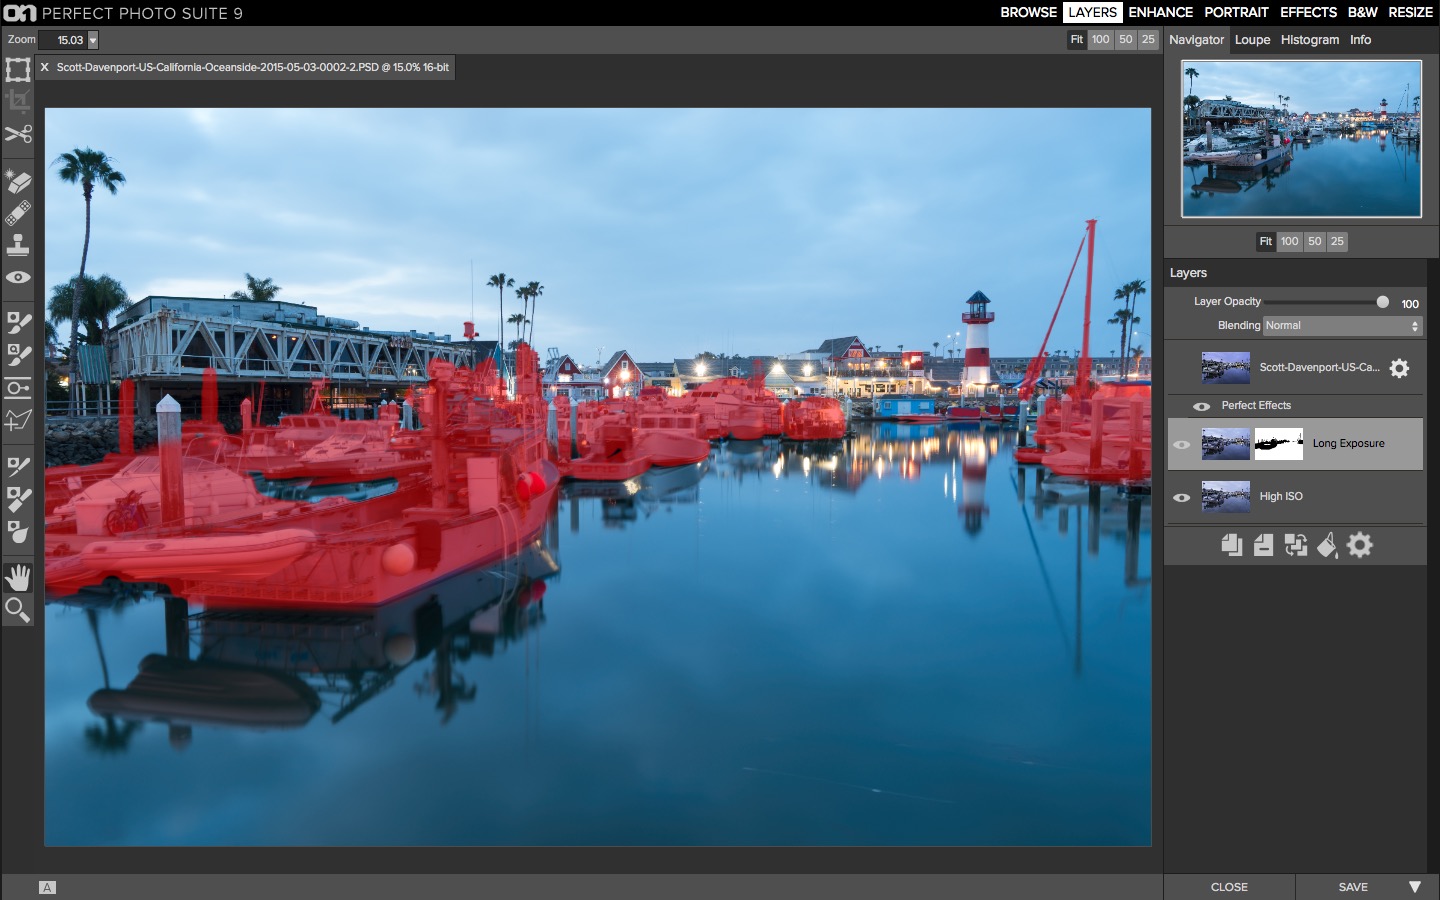 Mask away the subjects with motion blur
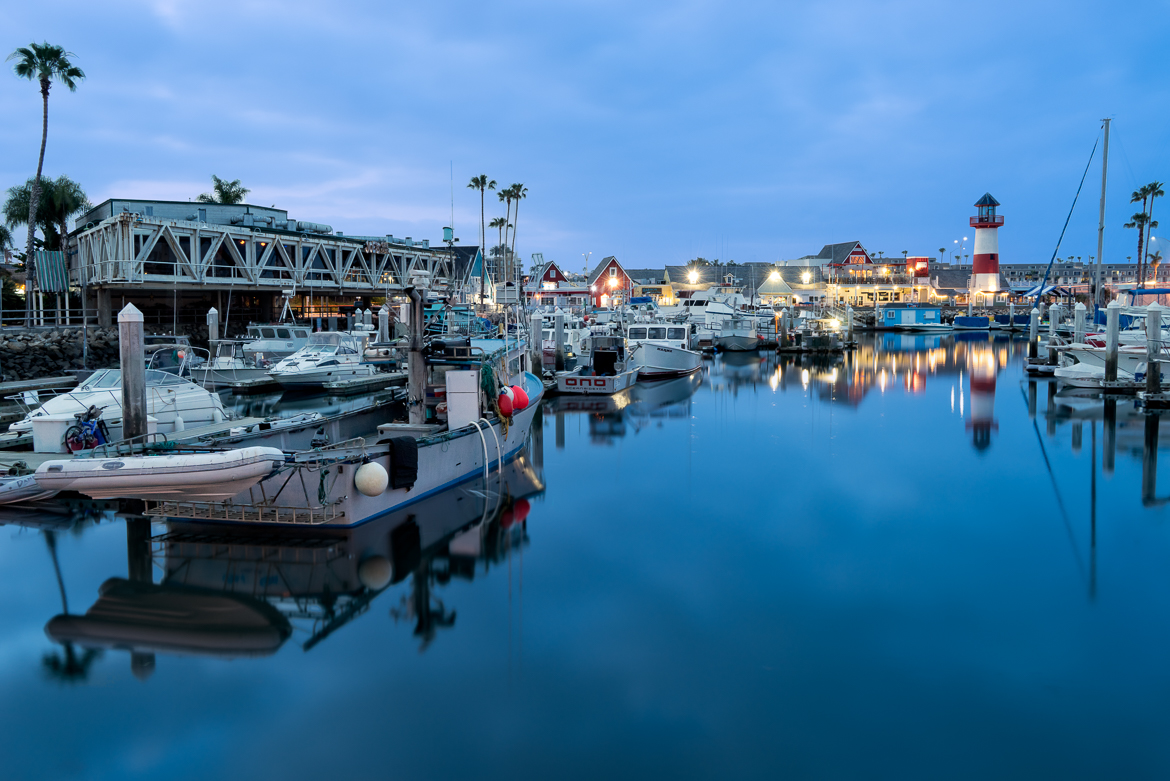
Once the masking is complete, create a composite layer so all visible pixels are combined into a single layer.
Finishing Touches
If your image needs finishing touches, do your stylizing on the composite layer. And now share your masterpiece with the world!

Do you have any great samples of compositing long and short exposure images together? Share them in the comments below!

Comments
on July 7, 2015 - 3:53pm
Scott, Great review and info. I’ve seen some of your educational videos on the on1 site. Thanks for all of the tips and the learning process.
Florian Cortese
www.fotosbyflorian.com
on July 7, 2015 - 5:29pm
Thanks Florian. Always good to hear my articles are helping folks.
Scott
http://scottdavenportphoto.com/
on August 8, 2015 - 11:17am
A further refinement:
Use a ND filter for the long exposure. That way you don’t need super-small aperture but can set it to the sweet spot (a landscape will probably be at the hypofocal distance so depth of field is not a reason for needing a small aperture).
Remove the ND filter for the second exposure, and the ISO will not need to be in the grainy range.
Another variation, which has other uses as well: Use bursts of short exposures, not a single long exposure. Average them in Photoshop as a stack to get the long-exposure effects, but mask out the moving objects. You can also leave out exposures that have a serious difference like someone walking though, even though that would have been in the middle of a conventional long exposure. In scientific instruments (like space telescopes) that’s called “Integration time” rather than a single long exposure: the CCD buckets are emptied many times and added up in software.
When “integrating” rather than using a long single exposure, you also have more flexibility of choosing the aperture: the individual exposures can sum to what would be overexposed in-camera, as you scale it after summing.