Crop for Instagram, from Your Smartphone!
Photo Moment - July 05, 2019
That's the Why… Now the How!
Now that you know why you want to do this, the next step is how.
The app you want is Photoshop Mix. It's free on iOS and on Android, and like Photoshop on the desktop, allows you to create a custom canvas size, and reposition layers however you like.
Scaling, cropping and “cropping” in Photoshop Mix
It doesn't matter how you store or organize your photos on your phone, as long as you can send it (preferably at a high resolution) to another app. I'm using Lightroom on my iPhone, so that's what the screenshots show, but again it doesn't matter. All that matters is that you can send to, or open in, Photoshop Mix.
From Lightroom, tap the Share button at the top of the screen, then tap Share again on the sheet that slides up, and then pick a resolution. At this point, 2048px is fine, but as we move to more advanced multi-tile images, you'll want to choose Maximum.
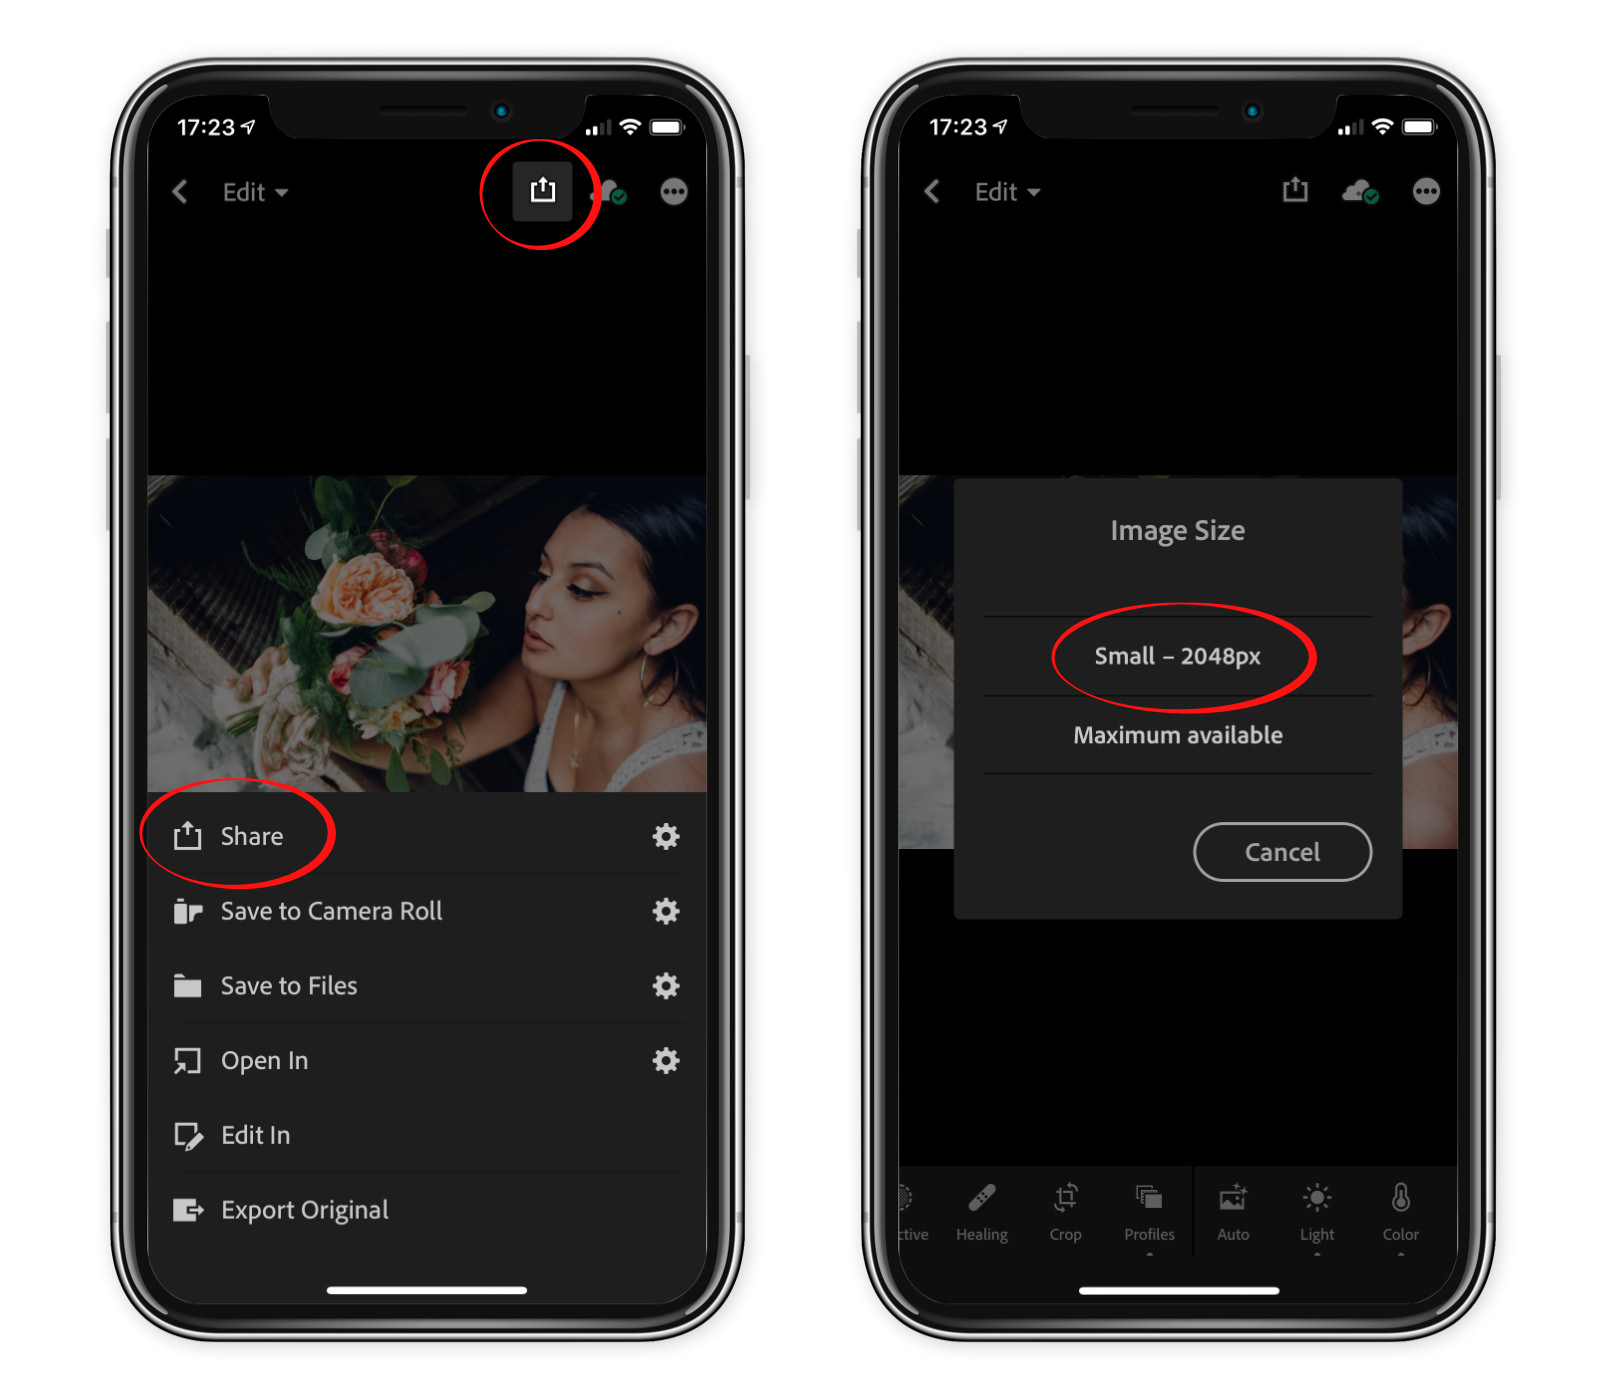
That will open the iOS Share Sheet, and you can choose Copy to Photoshop Mix. You may have to scroll to find it, and if you long-tap on it, you can then drag it to the front of the list if this is something you'll do often.
Once it opens in Photoshop Mix, it will create a canvas that's the same size as the photo. We'll change that, but first, we need to know our target size.
To change the canvas size, tap the Crop button (you're not really cropping here… it's a weird icon choice), then tap Custom to enter a custom size.
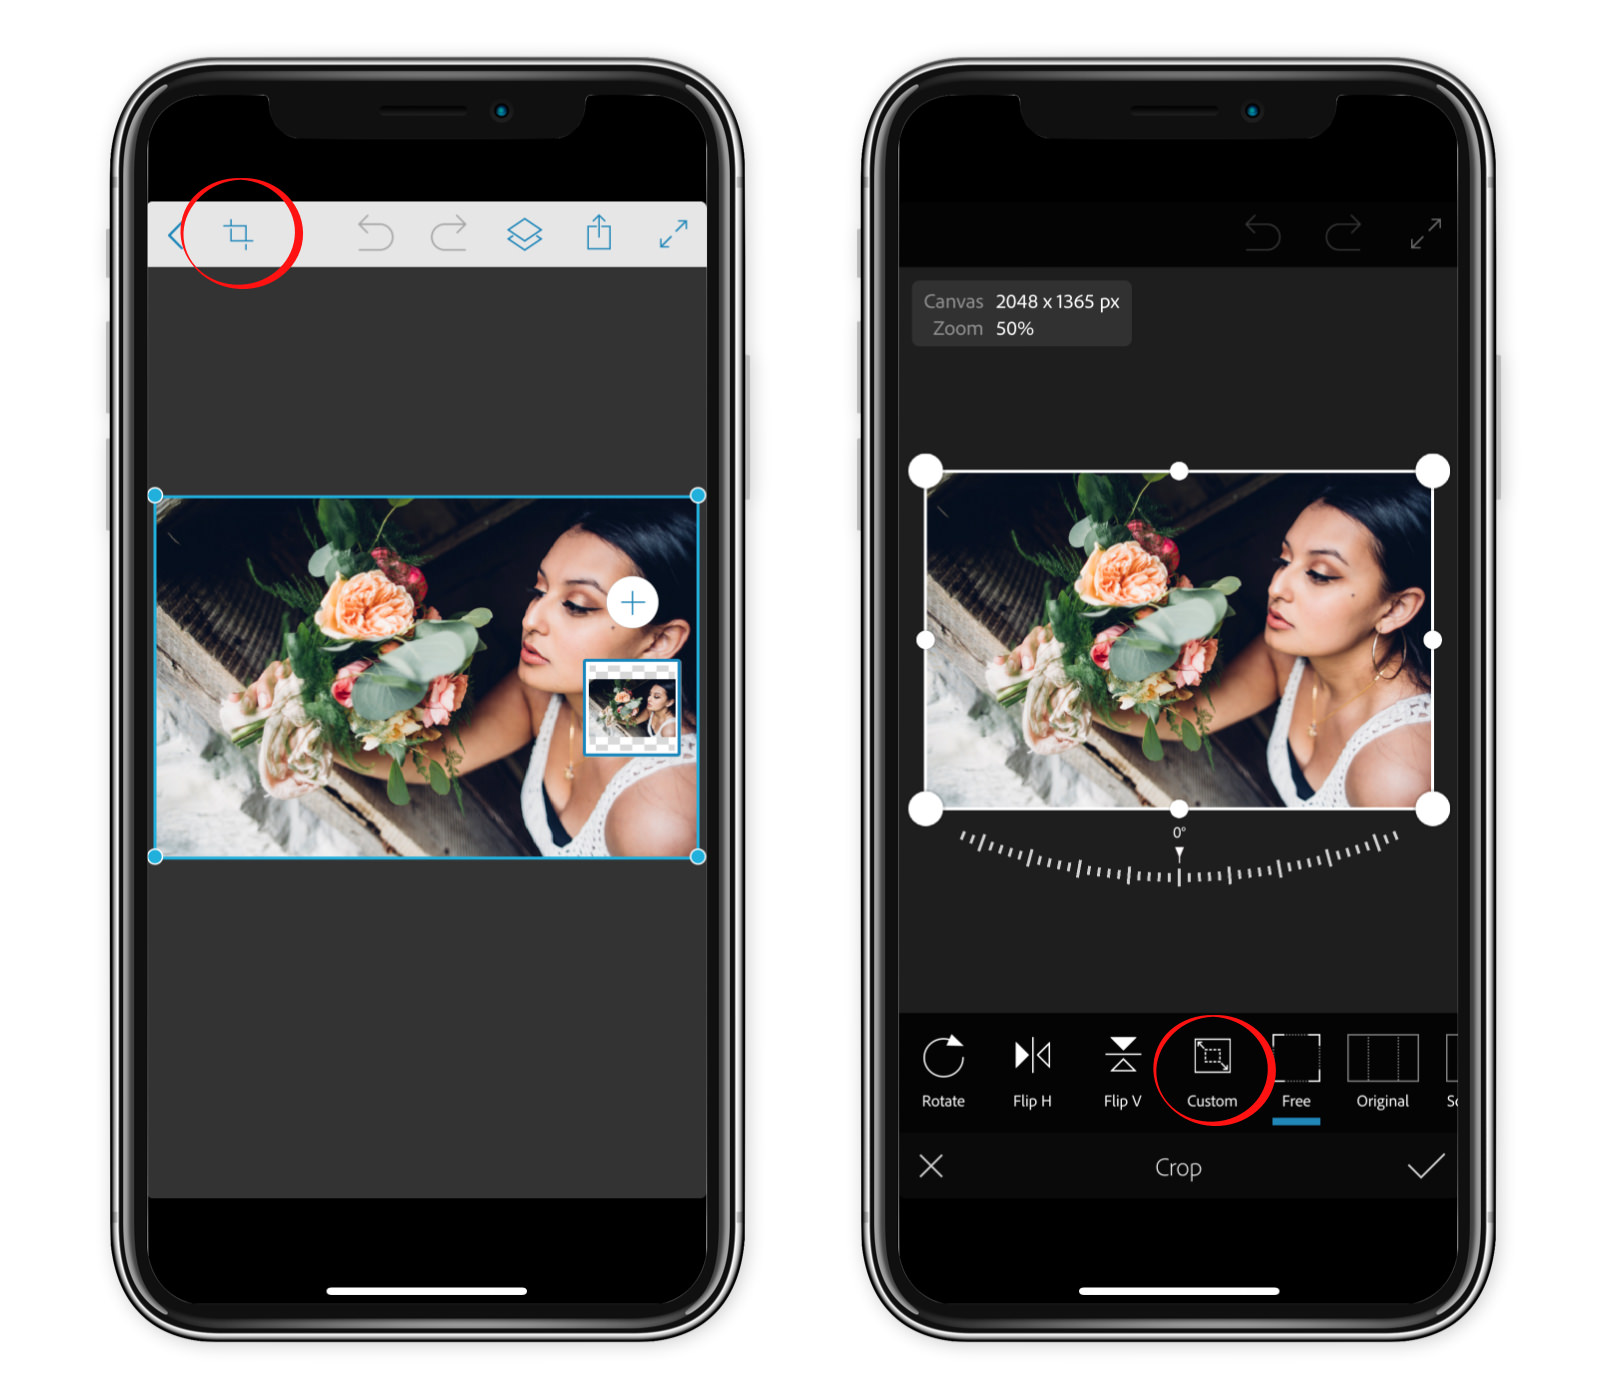
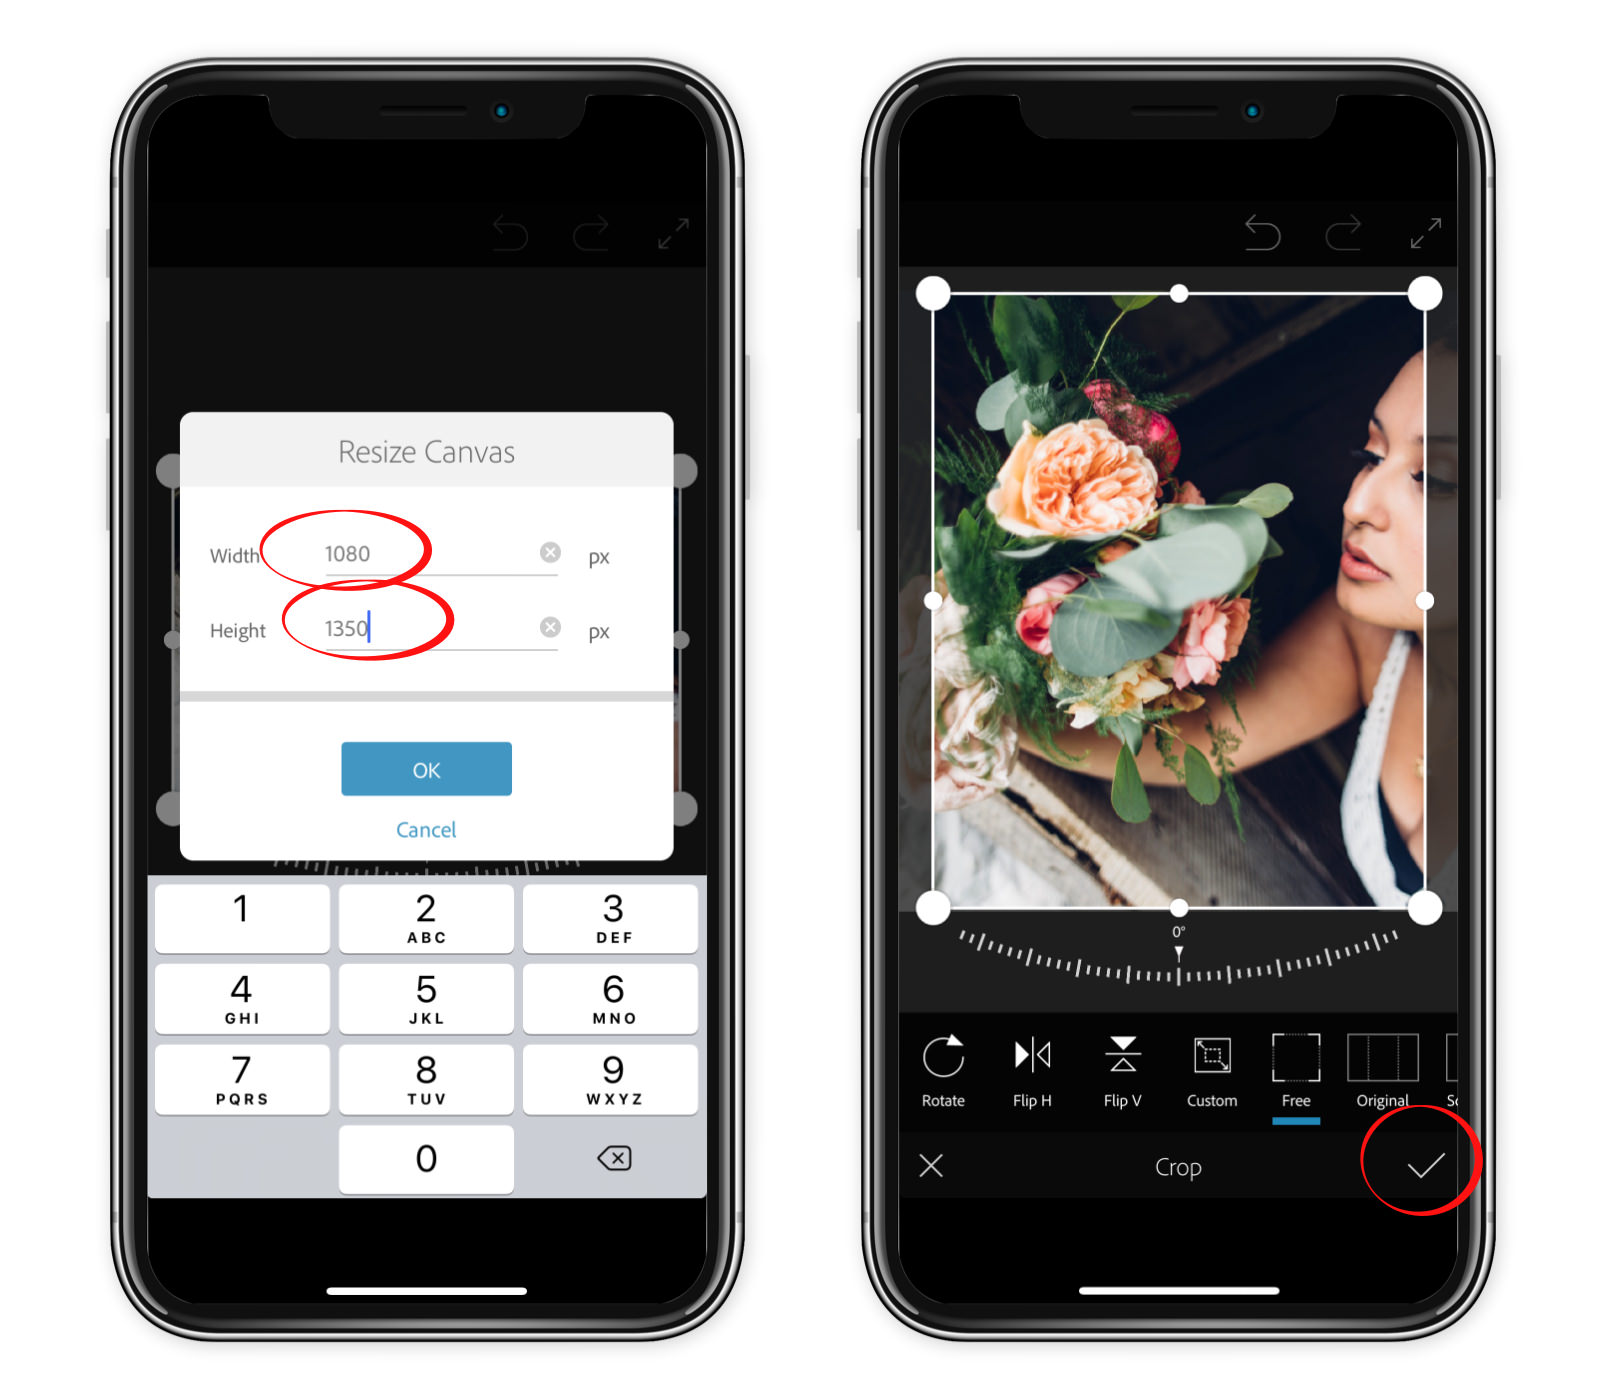
What size you see here initially will depend on what you sent to Photoshop Mix, and where you sent it from. Since I sent a 3:2 ratio photo from Lightroom and chose the 2048 size, I'm seeing 2048 width by 1364 height. You want to change that to 1080 wide by 1350 tall — the maximum size that Instagram will accept, per the sidebar above. (Make sure that the original image is bigger than 1080×1350, or it will have to be scaled up for export, which you don't want). Once you enter 1080×1350, tap OK and then tap the check box in the Crop window to exit that mode.
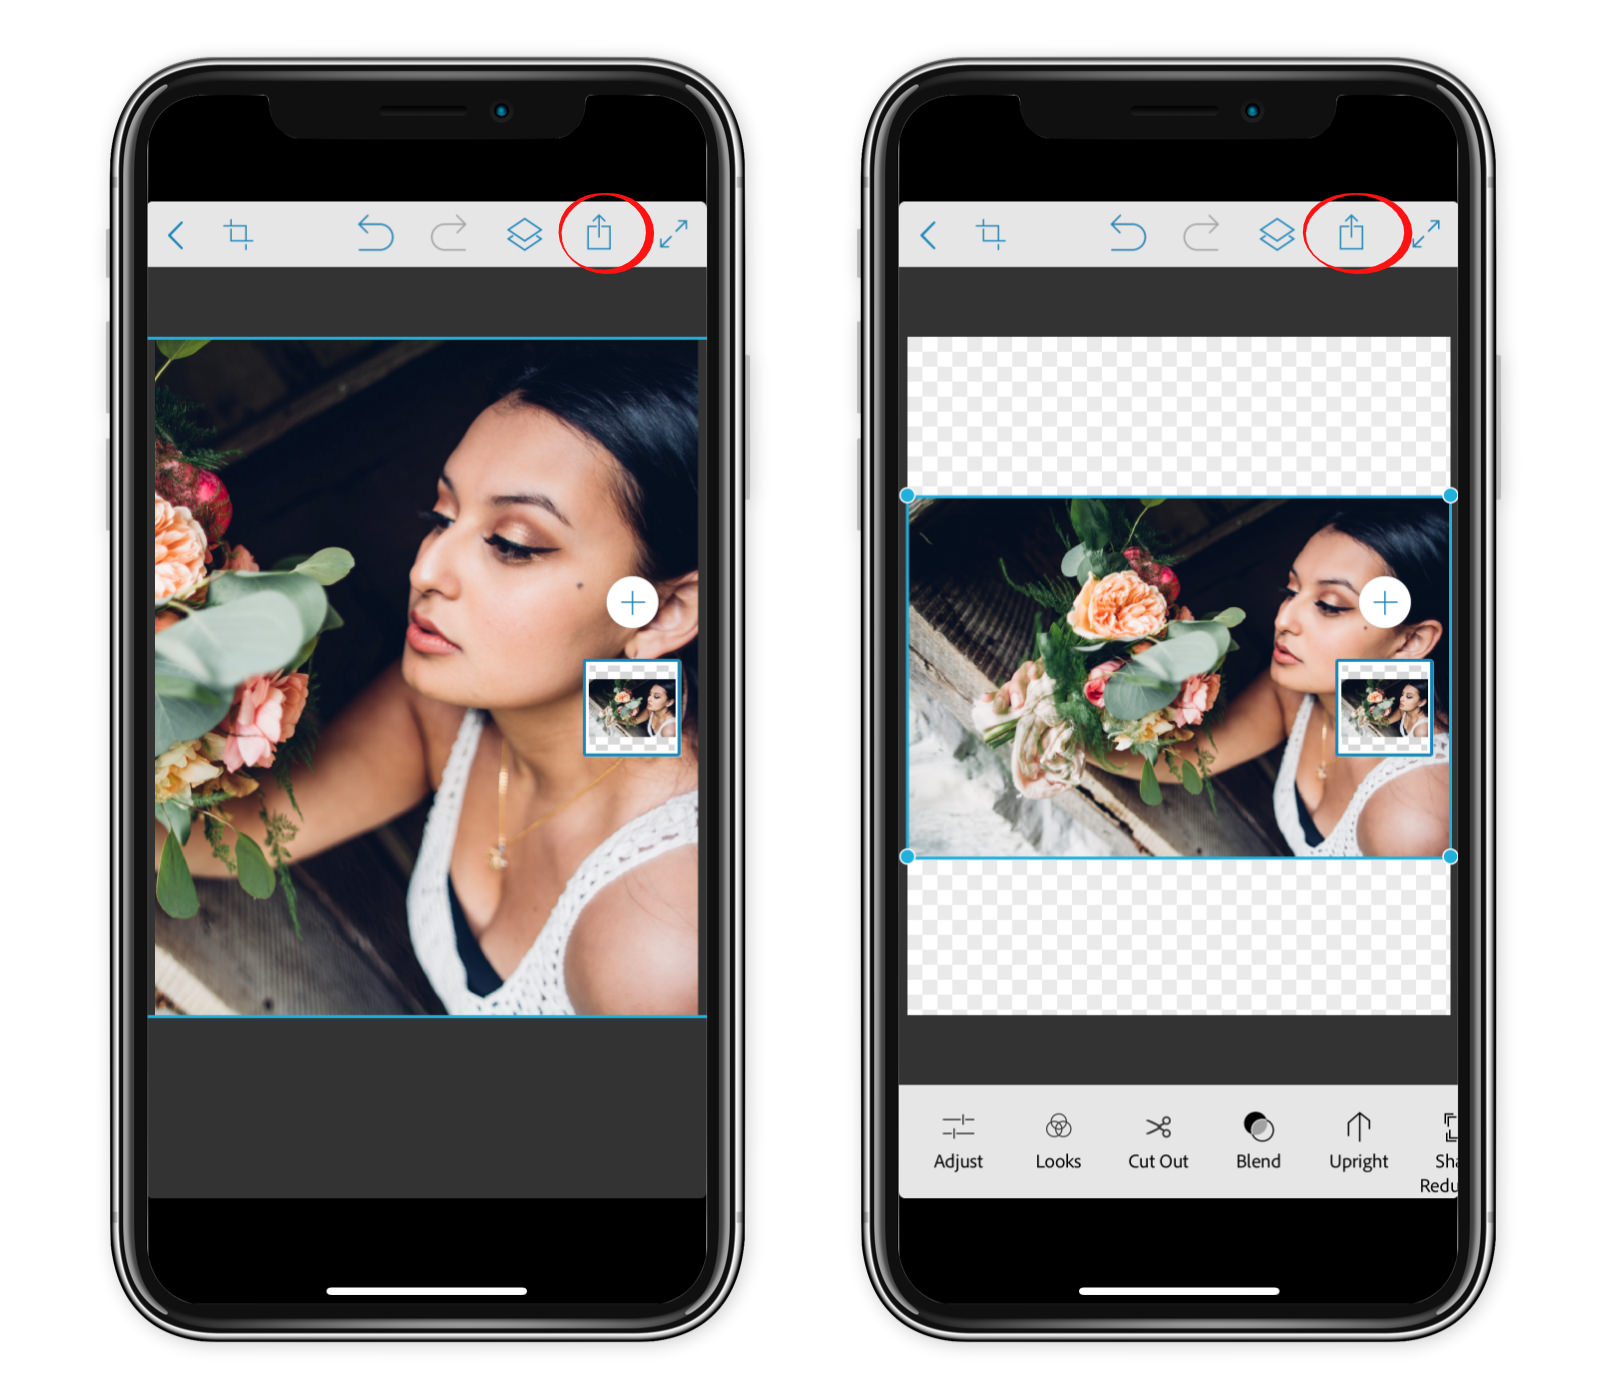
Now your canvas is at the optimum size, so you can reposition the photo however you like, and export it. Remember, the goal here is to create two images to upload. Both will be 1080×1350, but one will be a vertical crop of this landscape photo, and the other will show the entire photo with white borders on the top and bottom. To reposition the photo, just drag it around with one finger. To scale it, pinch it with two fingers. You'll get the feel for it pretty quickly, and note that the edges and center of the photo snaps to the edges and center of the canvas, making it quite easy to get the scaling right. The two screenshots below show the two different scaling you'll want to do. After you set each layout, tap the Share button (circled in red below), and then send to the Camera Roll. That will save each image to the camera roll where you'll be able to access it from the Instagram app.
That's it! Nice and simple… it really does go fast and the end results is two images that you can share on Instagram showing your image best for Instagram, and also showing the entire photo. So, let's get these online!
Importing to Instagram
Open Instagram, and create a new post as usual. Select the first image (that's the one that fills the 4:5 space), be sure to tap the double-headed arrow to expand it to the vertical layout, then tap the multi-selector icon, and finally the second image (the one with the white borders).
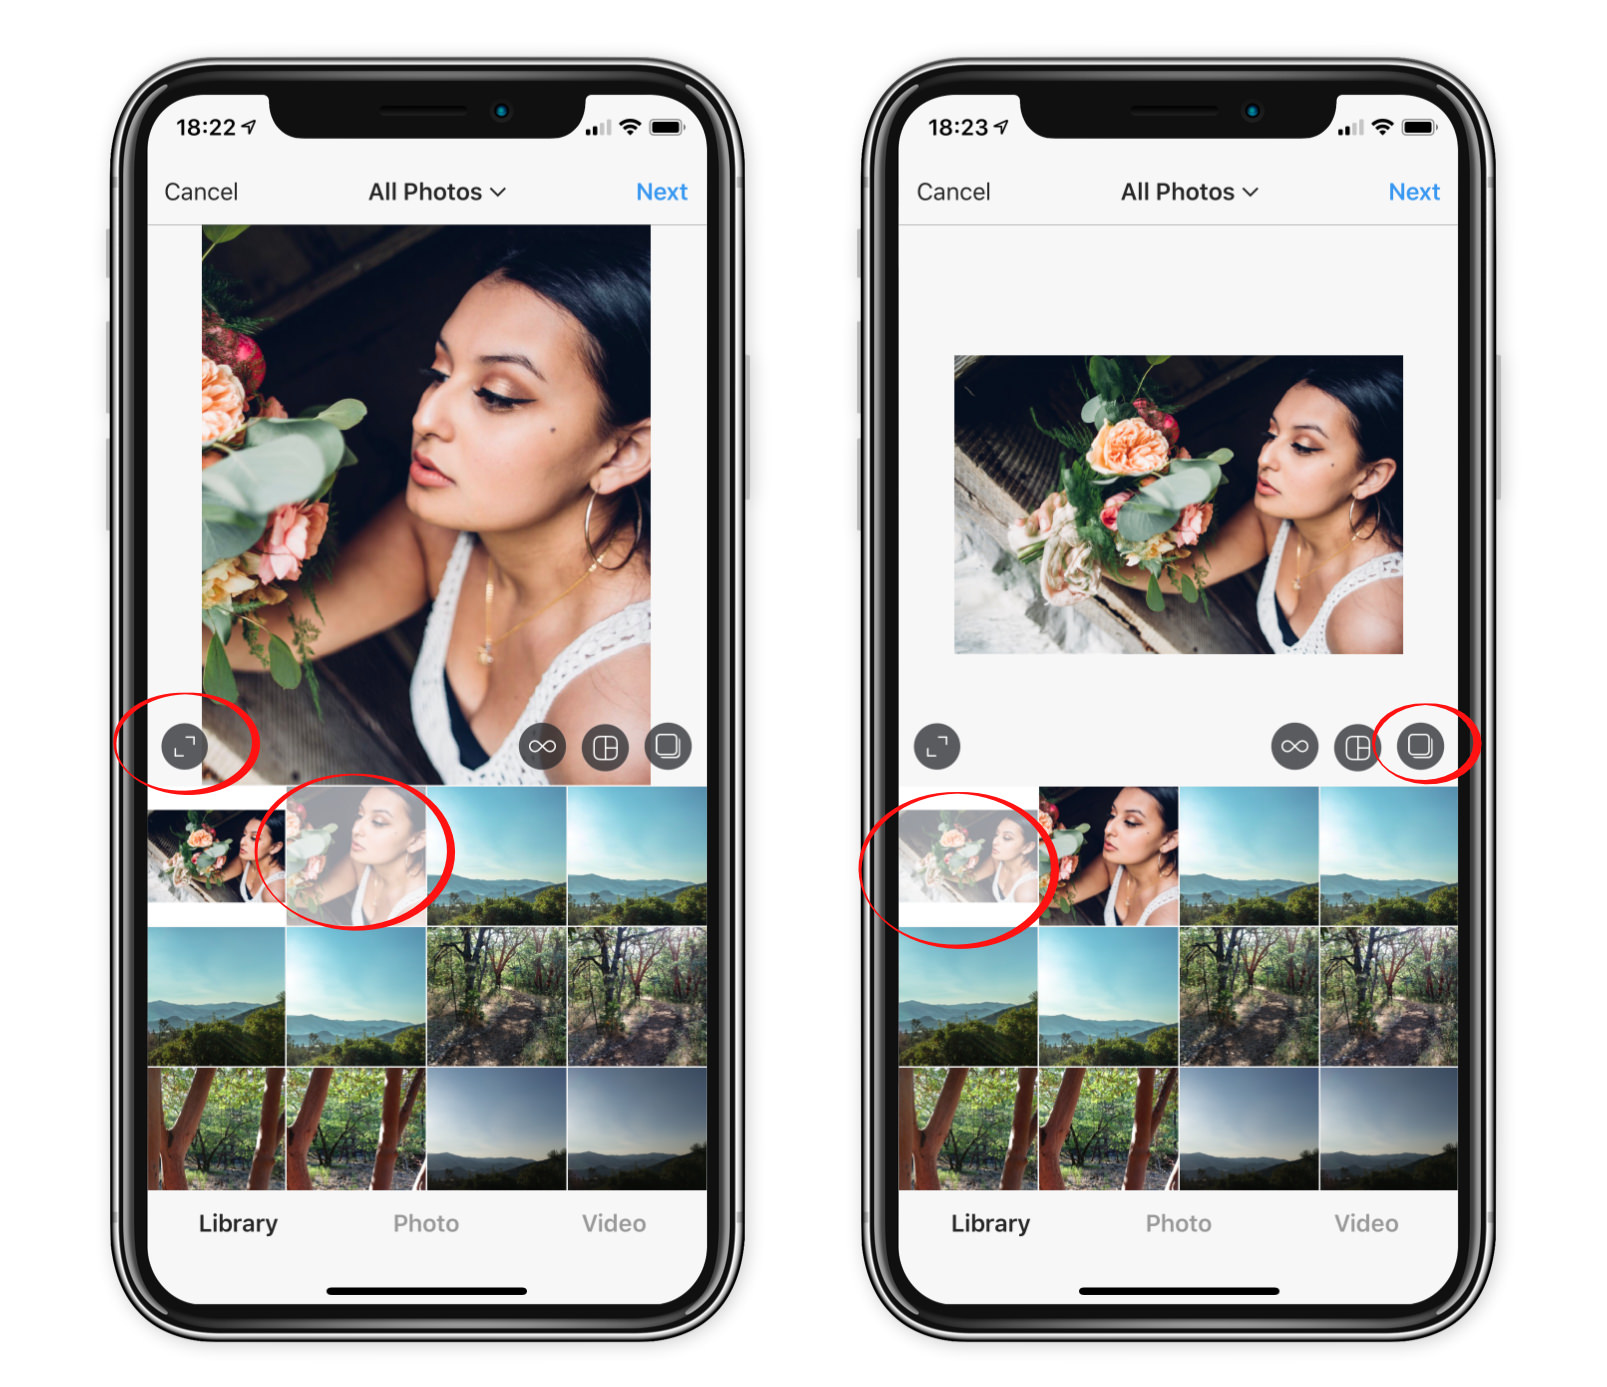
From here it's business as usual! Add your captions and tags, and away you go!
Next… ever seen those double- and triple-wide swipe-able images in Instagram? Learn how to create them yourself!
Also i am using the dark theme on instagram which makes it unpleasant.
what a stuuupid app! Fantastic video btw.... u won't believe how hard i'm struggling to just find how to change a photo's size, so i can fit my landscape (screen-shot for YT vids in my case) image onto Instagram! It's ridiculous! 👍 'd ur vid
#OldManPaxus Rating: ★★★ ½
Comments from YouTube