Crop for Instagram, from Your Smartphone!
Photo Moment - July 05, 2019
How about double and triple wide swipe-able images?
Another really cool thing you can do for Instagram, using this same technique, is make a double and even triple-wide image, where viewers have to swipe through to see the entire photo. You've undoubtedly seen this before in Instagram, and there are probably apps dedicated to doing this, but by doing it in Photoshop Mix you're taking complete control of the process.
Get your photo into Photoshop Mix as previously outlined, and if you're sending from Lightroom, you'll definitely want to open the maximum resolution file. You'll need those pixels.
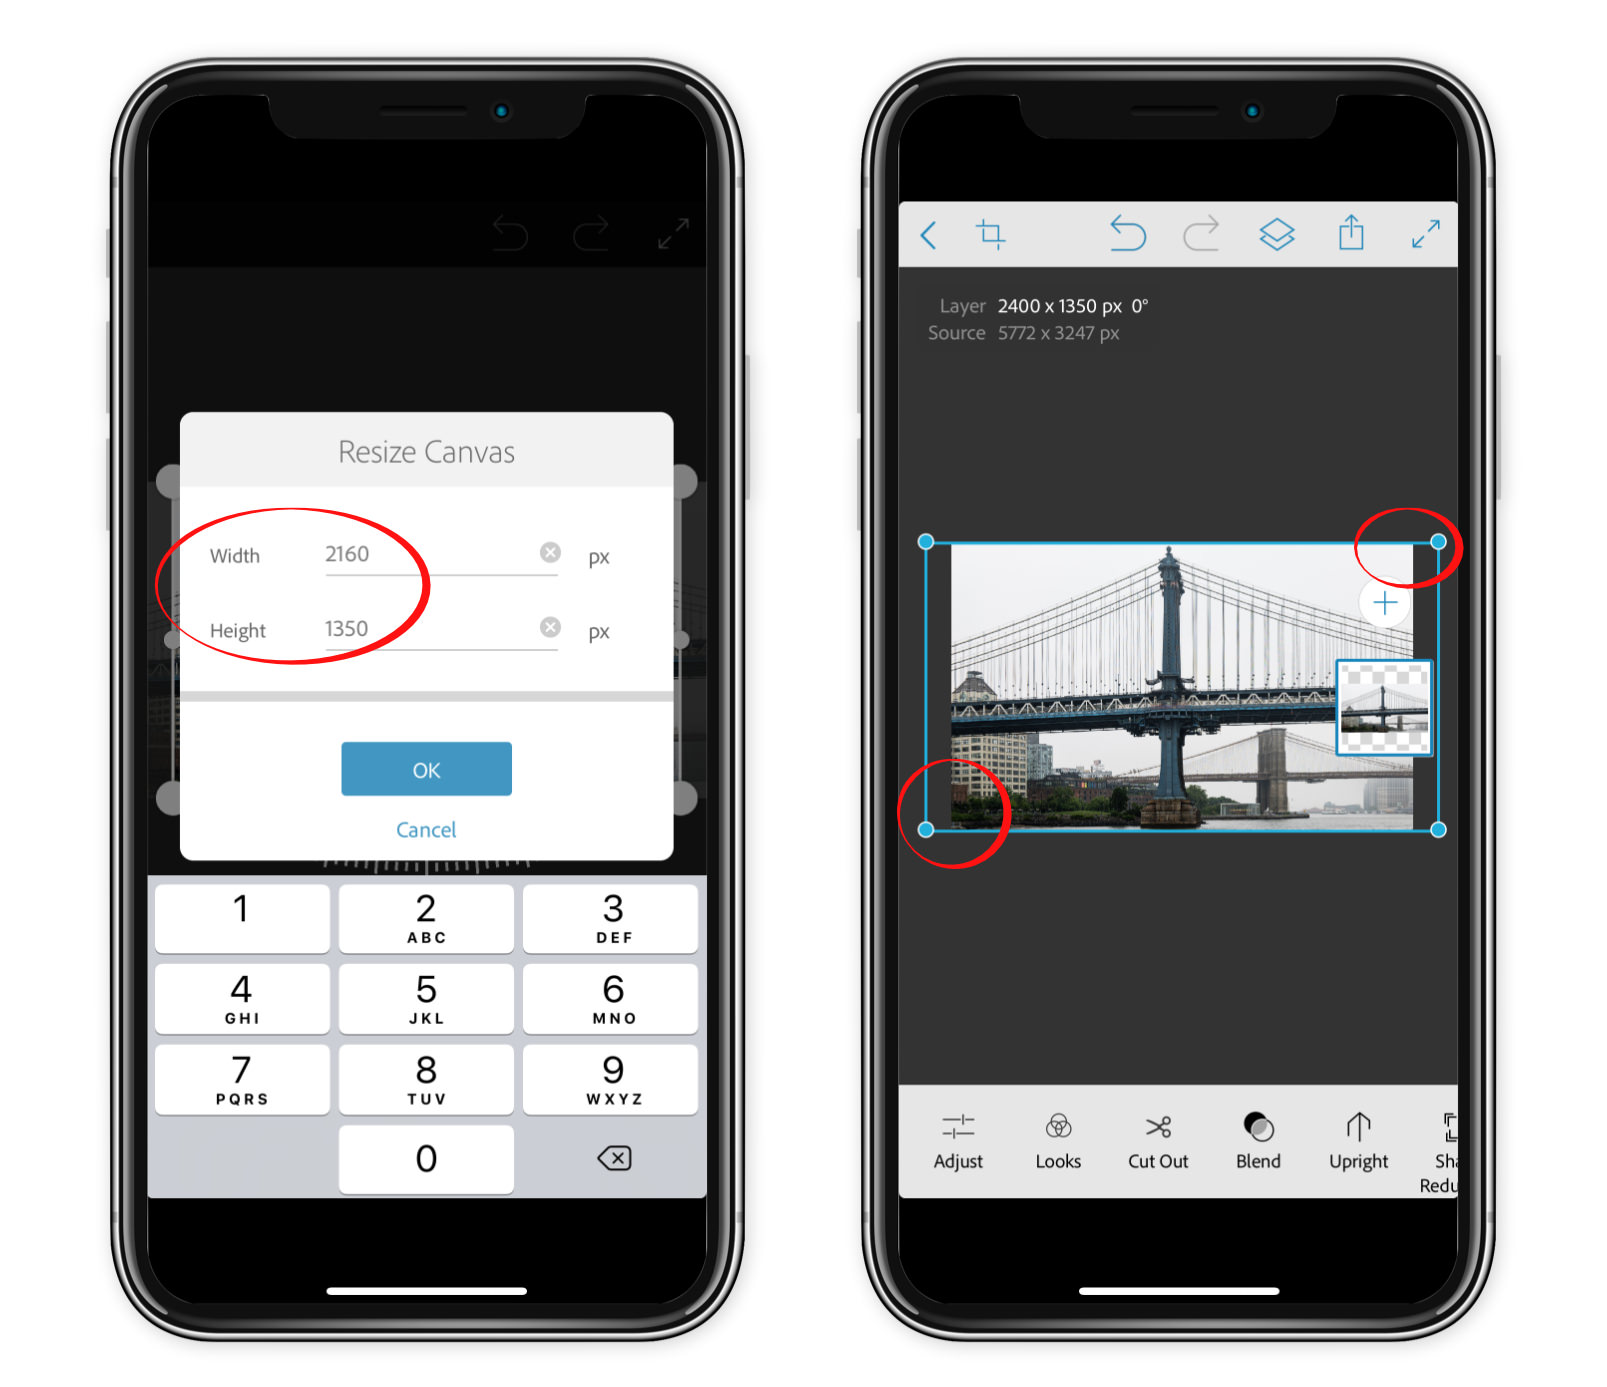
When it comes time to change your canvas size, for a two-tile image, make the canvas double-wide (2160×1350), and for a three-tile image, make it triple-wide (3240×1350). Once you've changed your canvas size, reposition the photo as you like, such as below. The fact that there is data hanging off the edges in the screenshot on the right is going to be a problem — I'm skipping the easy path because this way you'll know how to handle any situation! (The video above starts with the easy path then works its way through).

The next step is to change the canvas size to the optimized Instagram size of 1080×1350 and reposition the photo to export the left and right sides individually, but the problem we're facing now is that since the image above isn't snapping into the corners (see the red circles?), then there's absolutely no way to align the left and right sides. These have to be perfect or they won't line up in Instagram. If the image snapped perfectly into the left and right corners then this would be easy. But they don't, so we need to add a step.
Here's what we do to get to a point where we can save the left and right sides correctly.
- Start by aligning the image however you want it on the double- or triple-wide canvas, as outlined above.
- Save (Share to Camera Roll) the image. This will create a new file that is ONLY the data you see in the canvas. So it will trim the excess, and create a file at the exact size of the canvas. By the way, this is a PNG file, so you lose no quality doing this.
- Exit out of the workspace in Photoshop Mix by tapping the back arrow at the top left, bringing you back to the My Projects gallery, then tap the + to create a new project.
- Select the photo you just exported in step 2. This creates a new canvas at the same size and places the image into it.
- Resize the canvas (crop button) to the Instagram-needed size of 1080×1350.
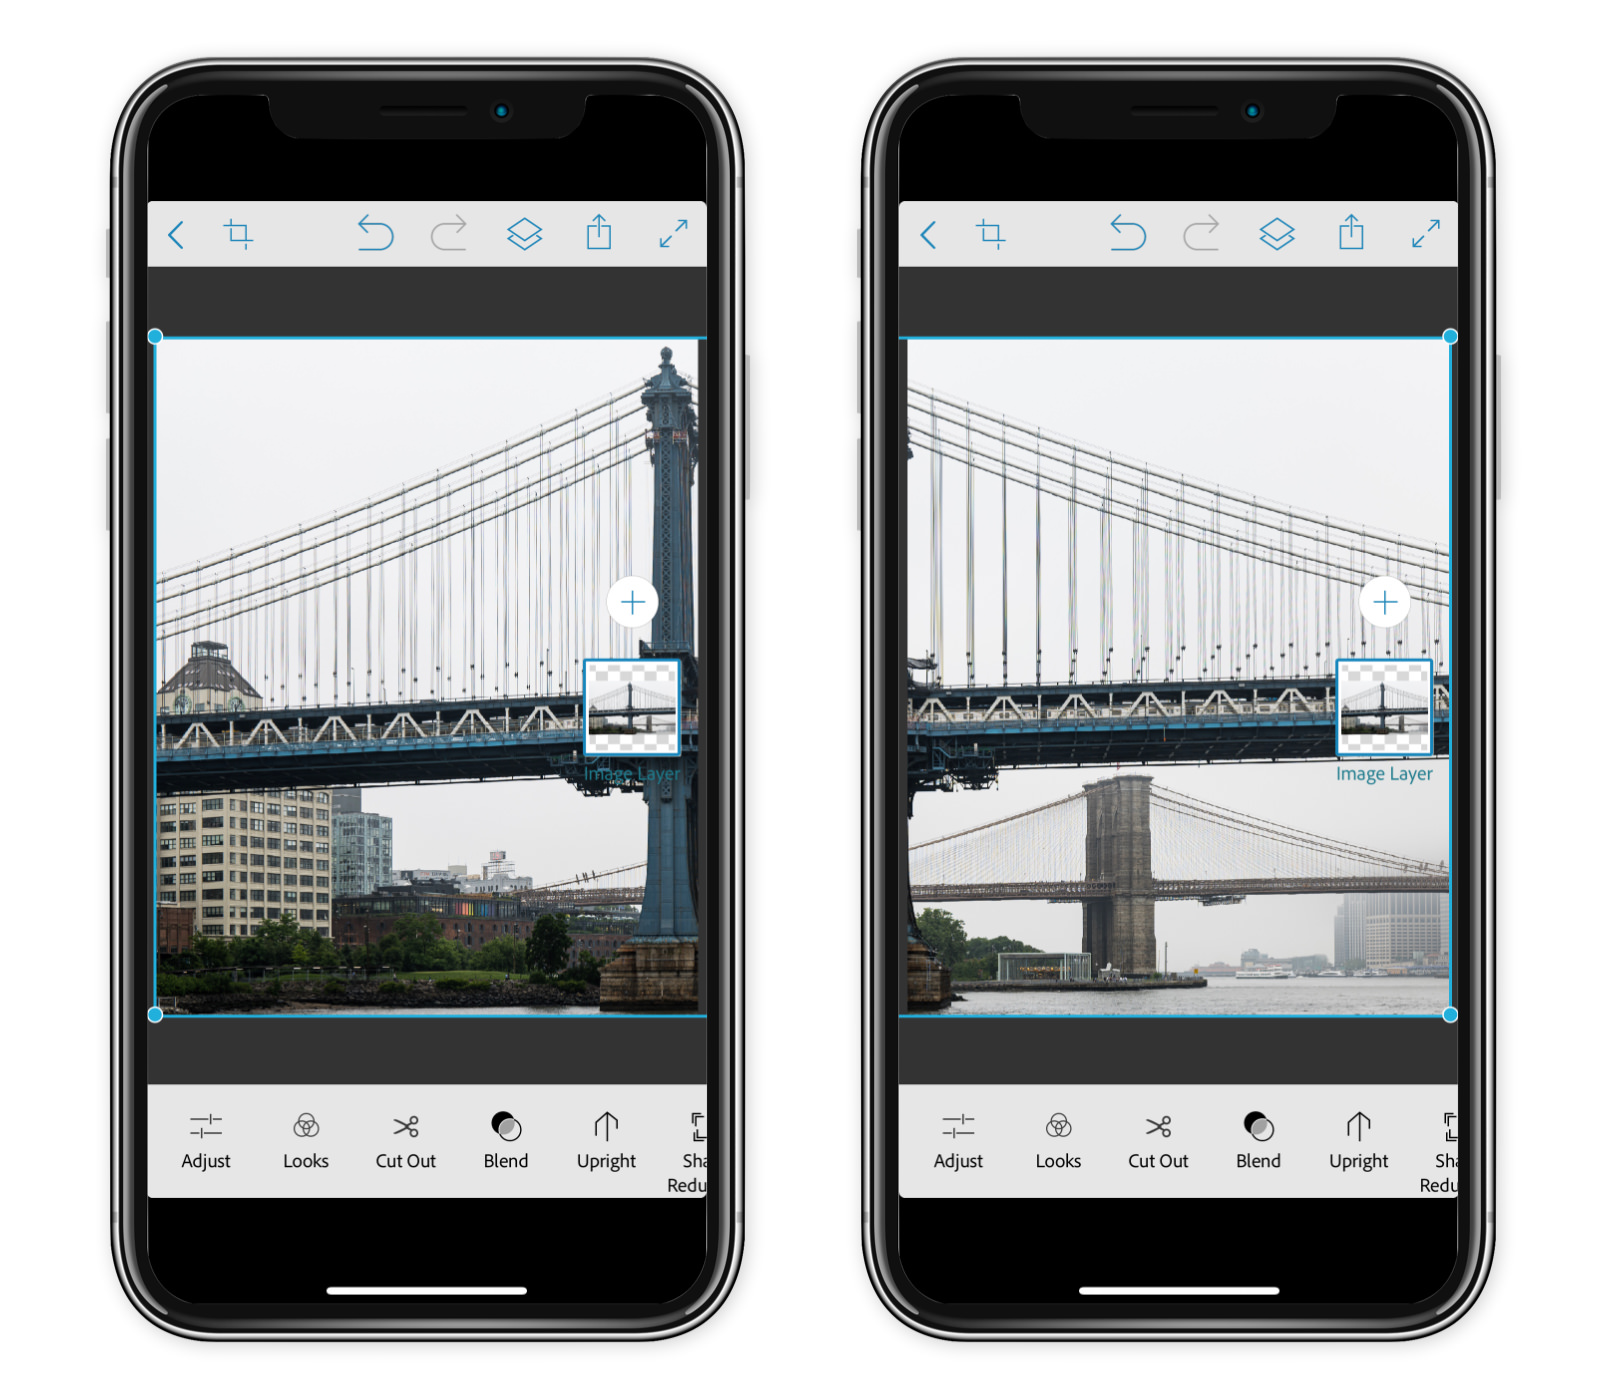
- Drag the image to one side, ensuring that it snaps to the corner, and save that to the Camera Roll.
- Repeat that with the other side. See below for the final settings, showing the left and right side, ready for export.

Now, off to Instagram!
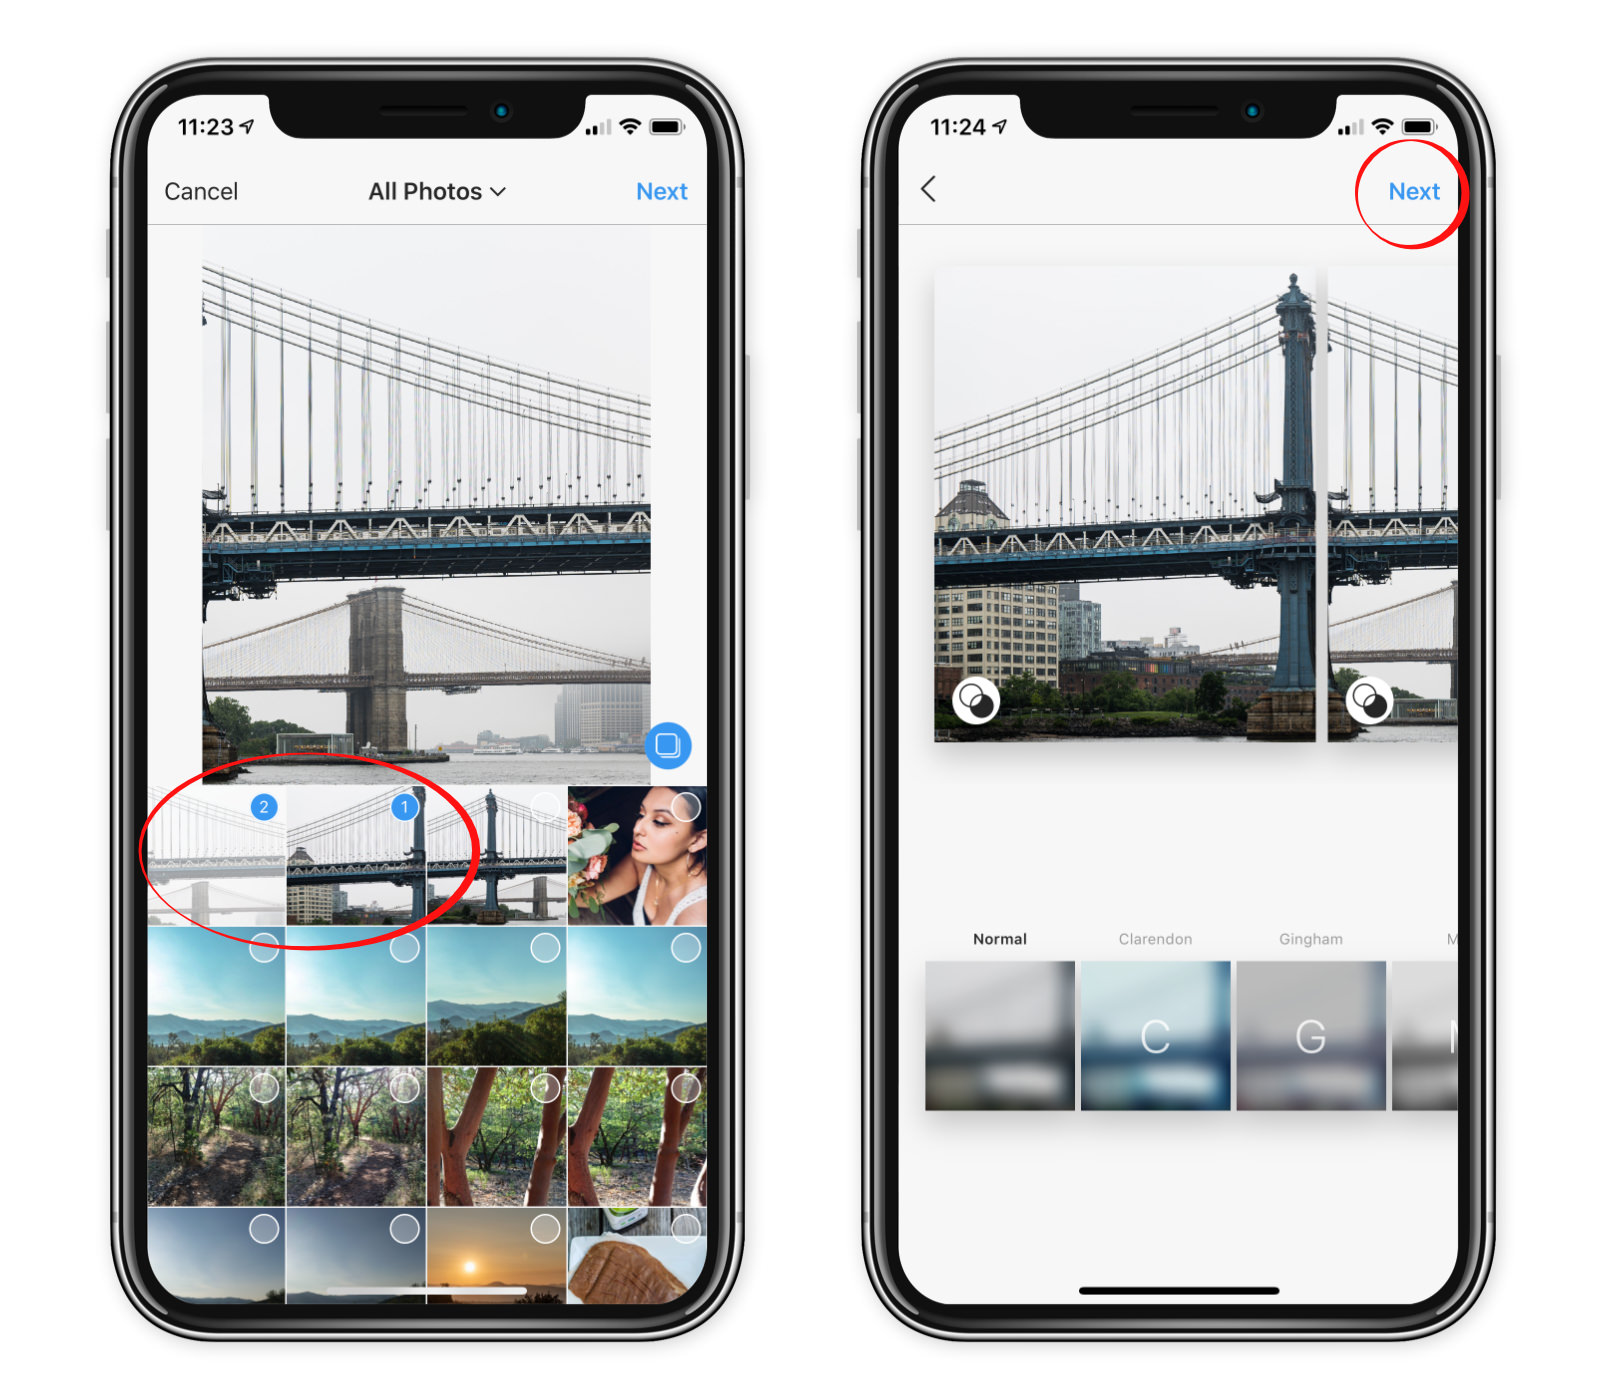
- Select the left side image, and tap the zoom arrow to fill the screen with the vertical image
- Tap the multi-select icon, then choose the second image
- Tap Next, which will show you an editing preview, where you'll also see a gap between your photos. Don't worry, that gap is only visible here. Tap Next again.

Now you're ready to preview the actual post, as your audience will see it. Tap the icon as in the animation below, then swipe to ensure that there's no visible seam. If you do see a seam, then that means either the images didn't snap to the corner when exporting the left and right sides, or that the canvas wasn't set to the precise 1080×1350 size (I've made both mistakes, so… 😬)
To make a triple-wide image, do the exact same thing as above, but of course start with a triple wide canvas of 3240×1350. Save that full size image, and re-open it in Mix. Then when you resize the canvas again to the necessary 1080×1350 size, don't touch the image. It will have zoomed perfectly into the middle of the image, so you immediately export that portion first. Then pan it to the left and export, and to the right and export. When you “reassemble” the image in Instagram, just be sure to select them in the correct order, from left to right.
Go vertical!
You could even take a tall image instead of a wide one, and rotate it 90˚ then build a two- or three-wide tile, so the viewer has to rotate the phone. It's a fun way to view an image! Here's a post I did like that:
That's it for this post… it was a long one! If you haven't watched the video yet, scroll up to see that. Below is the full LIVE show (which was really fun because I shot this as a behind the scenes of filming the show for editing… it was kinda meta!) along with the Q&A afterwards. Be sure to check out Sean's video as well, also below.
Thanks for reading and watching!
Today's Q&A and Unedited Live Show
See what you missed in the full, unedited LIVE show, including an entire “behind the scenes” pre-show! (This starts with the Q&A; back up if you want to see the whole live show)
Other Videos Mentioned
Pages
- « first
- ‹ previous
- 1
- 2
- 3
Also i am using the dark theme on instagram which makes it unpleasant.
what a stuuupid app! Fantastic video btw.... u won't believe how hard i'm struggling to just find how to change a photo's size, so i can fit my landscape (screen-shot for YT vids in my case) image onto Instagram! It's ridiculous! 👍 'd ur vid
#OldManPaxus Rating: ★★★ ½
Comments from YouTube