Creative Filters and Effects with Tiffen Dfx v4 (part 1 of 2)
In November 2014, The Tiffen Company released version 4 of its digital effects suite called Dfx. The product is aimed at both videographers as well as photographers. The video plug-in version at $499.95, which works in Adobe After Effects and Adobe Premiere Pro, Apple Final Cut Pro and Avid Editing Systems, is much more expensive than the photo plug-in at $149.99 and works from Aperture, Lightroom, Adobe Photoshop and Photoshop Elements as well as Capture One, though this is not advertised.
Although I’d previously heard of Tiffen optical filters, I’d not heard of Dfx before so this article approaches the program both as a newcomer to Dfx and as a photographer only, as I don’t have the programs, or the skills for that matter, to test its video capabilities.
Tiffen Dfx v4 features and highlights for this new version include:
- OFX plug-in support, making it compatible with multiple professional digital intermediate programs
- 12 new filters – Borders, Cartoon, Colorize Gradient, Detail, Develop, Grunge, Harris Shutter, Pastel, Pearlescent®, Radial Tint, Satin® and Tone Adjust
- 93 historical film processes
- 30 motion picture film stocks
- More parameters and tools added to presets (includes new tools for color correction, tint enhancement and gradient control)
- New edge-aware smoothing algorithm
- New Curve Tool designed to control tonal range through RGB and individual red, green and blue curves
- Improved interface including a new optimized preview size so images can now be previewed in 4096, 2048 and 1024 pixels
- Mac Retina display support
Downloading and installing the trial version was a breeze though I did find the large number of product variants on the products page a bit confusing at first. I installed the Photo Plug-in, which also gave me access to the standalone program though I didn’t use this except to input the validation code.
Organization and Philosophy
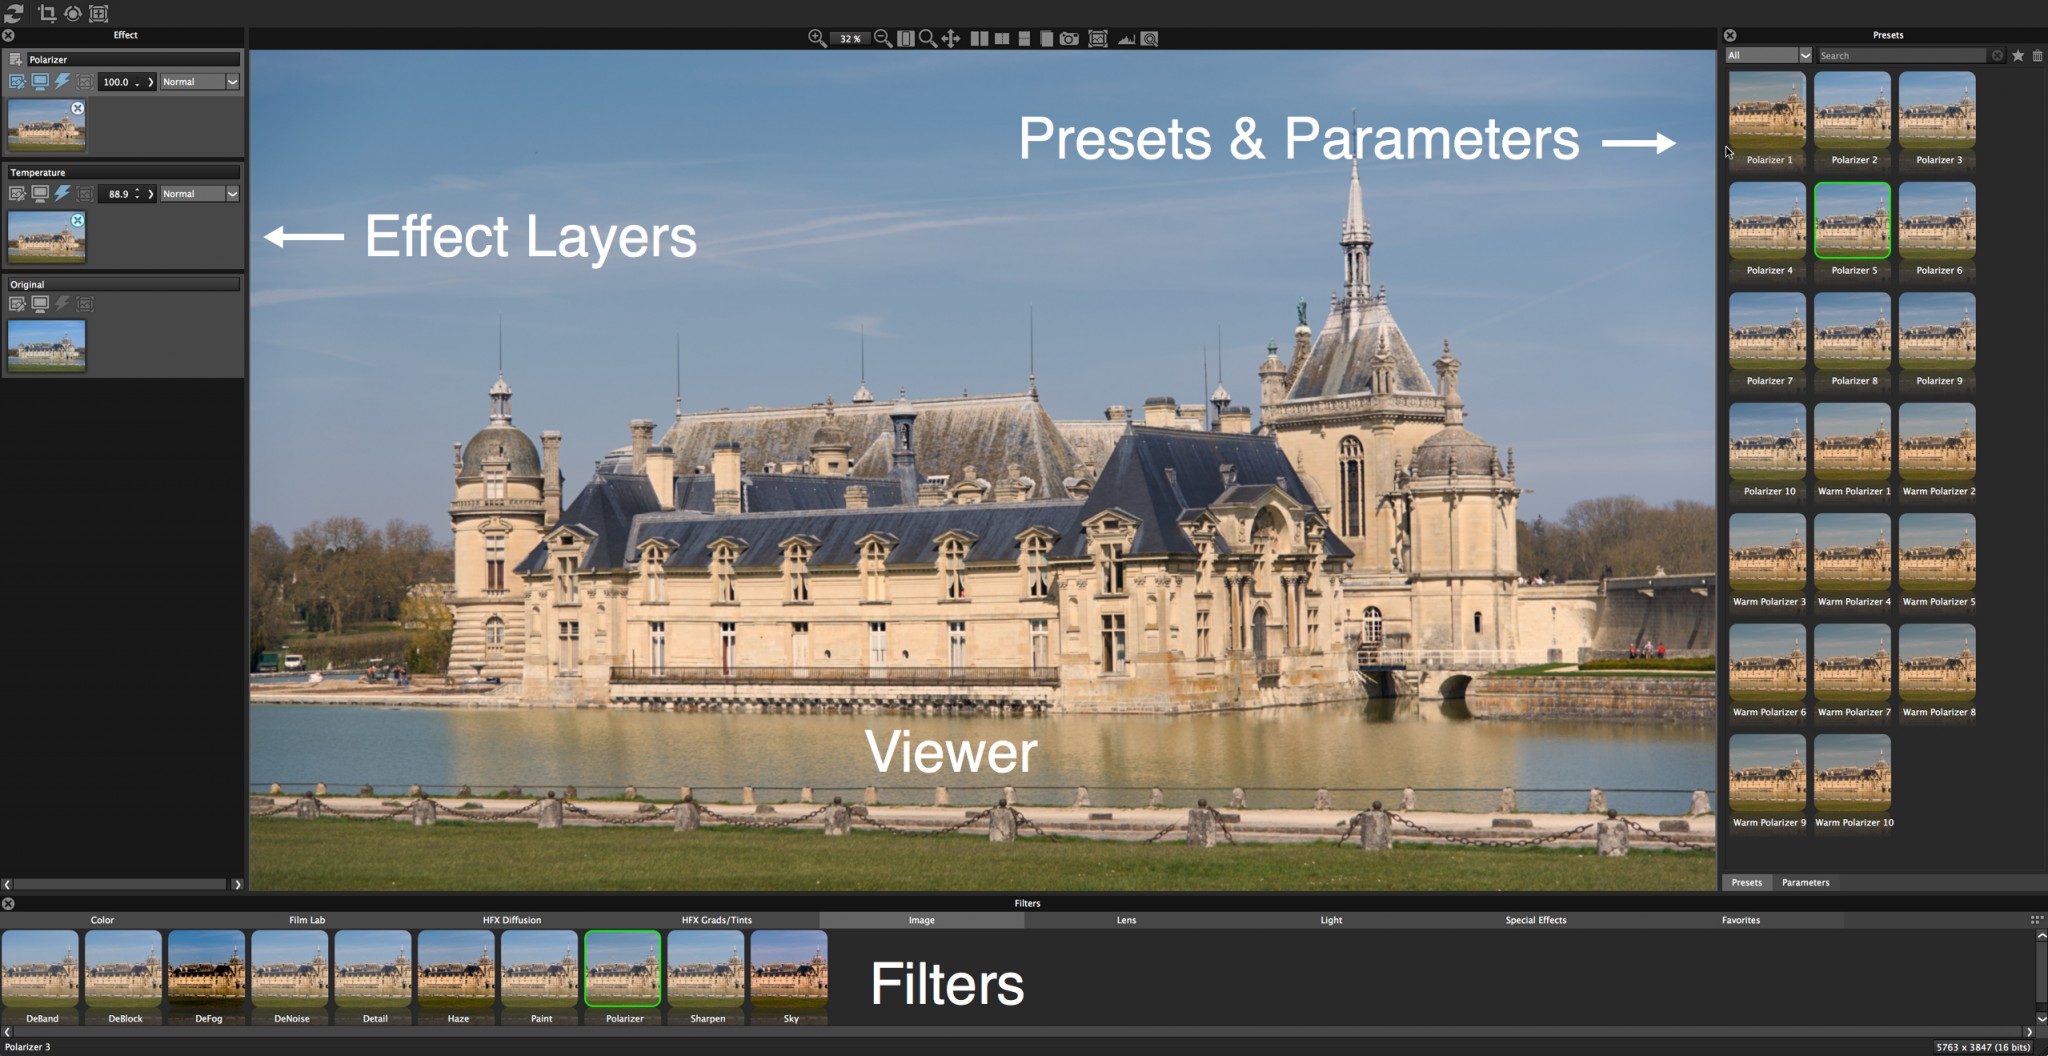
Dfx is organized into 4 main window panes: Viewer, Filters, Presets/Parameters and Effect with multiple layers as can be seen in the screenshot below.
 The 4 window panes in Dfx
For those of you interested the picture shown here is of Château de Chantilly, which is about 40km north of Paris, France. In this image, I’ve added a temperature filter dialed back to 88.9% opacity to warm up the picture as well as a medium-strength polarizer filter.
The basic philosophy behind Dfx is to enable you to quickly select from a large range of filters: select a filter from the Filters strip in the pane below the main viewer window, choose from a range of presets in the right Presets pane, tweak using the Parameters tab in the same pane; then add a new layer in the left Effect pane; repeat and rinse to your heart’s content. For each of the layers you can reduce the opacity of the filter and select the blending mode.
This is a great way to see the range of choices available to you and to pre-visualize what adding a particular effect or preset will do. It’s quite a different paradigm to the main photo editing and asset management programs out there (Aperture, Lightroom, Capture OnePro, etc), which typically present you with a range of tools with sliders. You can of course get many of the same effects with these programs but you need to know where you are going and how to get there, and of course the range of filters in Dfx is impressively large. With the Dfx interface you can hop between filters and layers just for fun until you come across one or a combination that takes your fancy or delivers the specific result you want. Those of you who have used Photomatix or ColorEfexPro will be familiar with the Dfx paradigm.
Filters and Presets
The main filter groupings arranged as tabs are: Color, Film Lab, HFX Diffusion, HFX Grads/Tints, Image, Lens, Light and Special Effects with a Favorites tab where you can place your favourite presets by clicking the star icon in the right presets pane. Each filter typically has a range of presets associated with it presented in the Presets pane. The presets are variants of a specific filter, where some of them show various levels of intensity. Some of the filters are really quite subtle, others hit you in the face; the film tones especially I found to be quite weird in many cases—did these film types really deliver some of these colours?
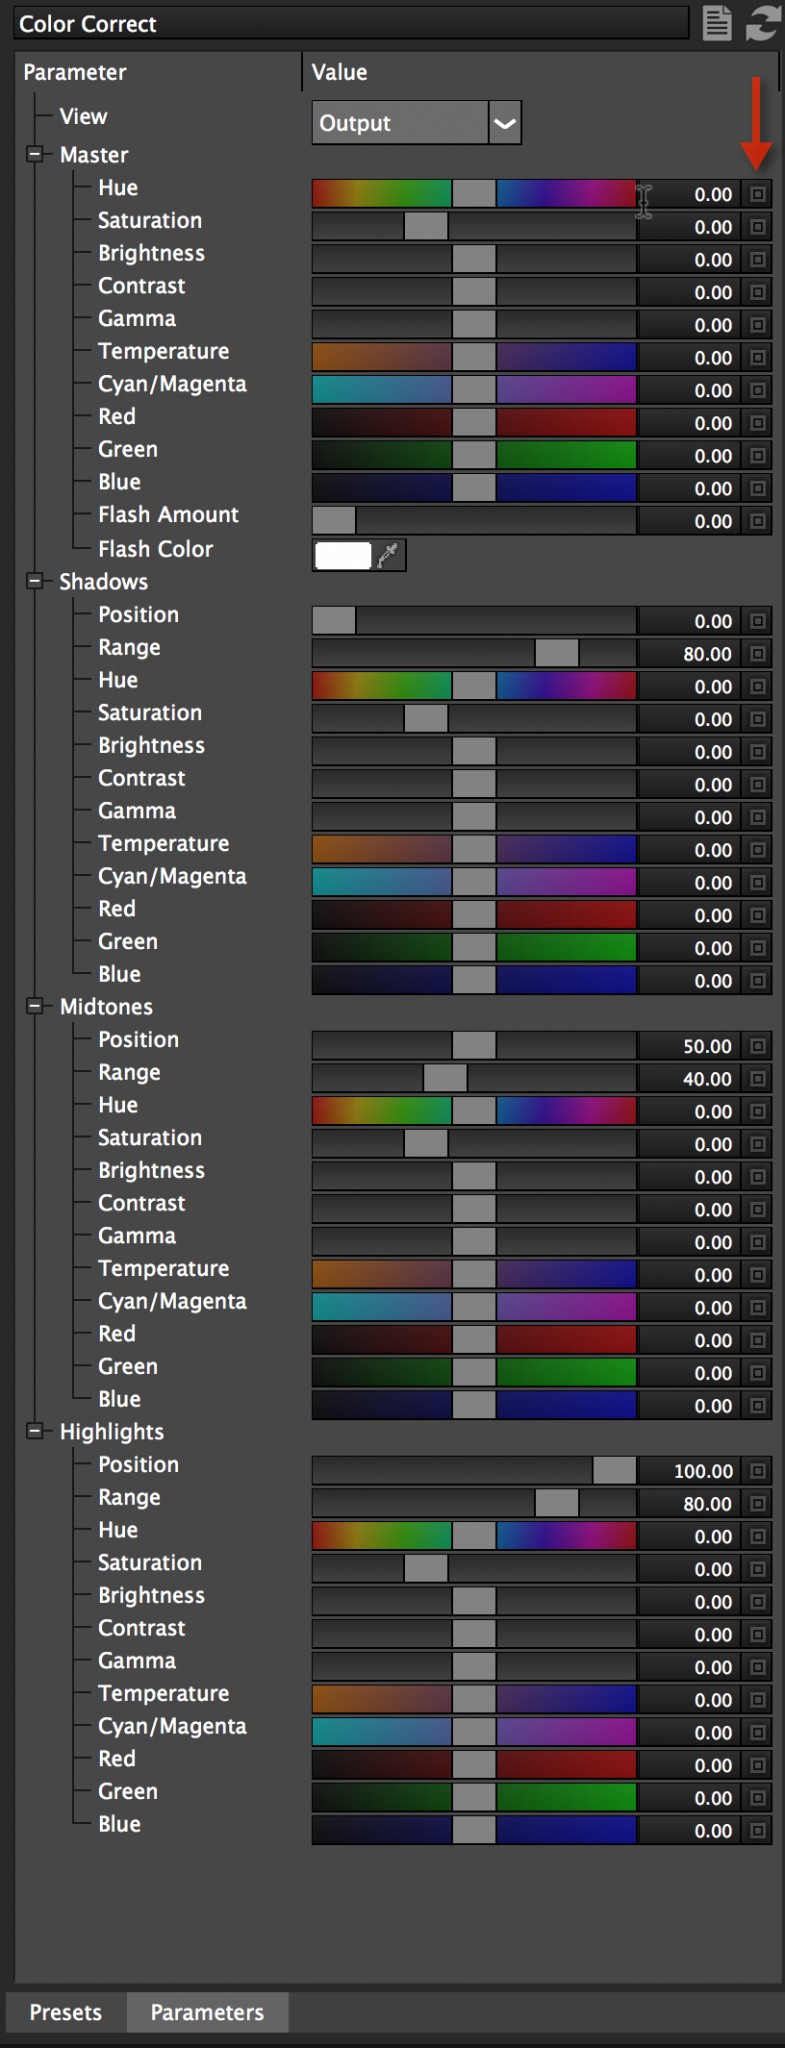
Most of the Color filters have just one preset so you are automatically presented with just the adjustment sliders in the Parameters tab to change the specific colour attributes for the overall master image or just for the shadows, midtones or highlights. To reset the individual sliders you click on the far right icon (underneath the red arrow below) rather than double-clicking, which had me fooled for a few moments.
 The Color Correct Parameters tab
The range of filters is vast and includes various film stock tones, optical filter types and gels, gradients, colour correction filters, grain and grunge filters, haze and de-fog, cartoon and border effects, textures, black and white, lighting effects, pencil, lens effects… and the list just goes on. Among the new filters in v4 is the Harris Shutter filter, which separates an image for the red, green and blue channels.
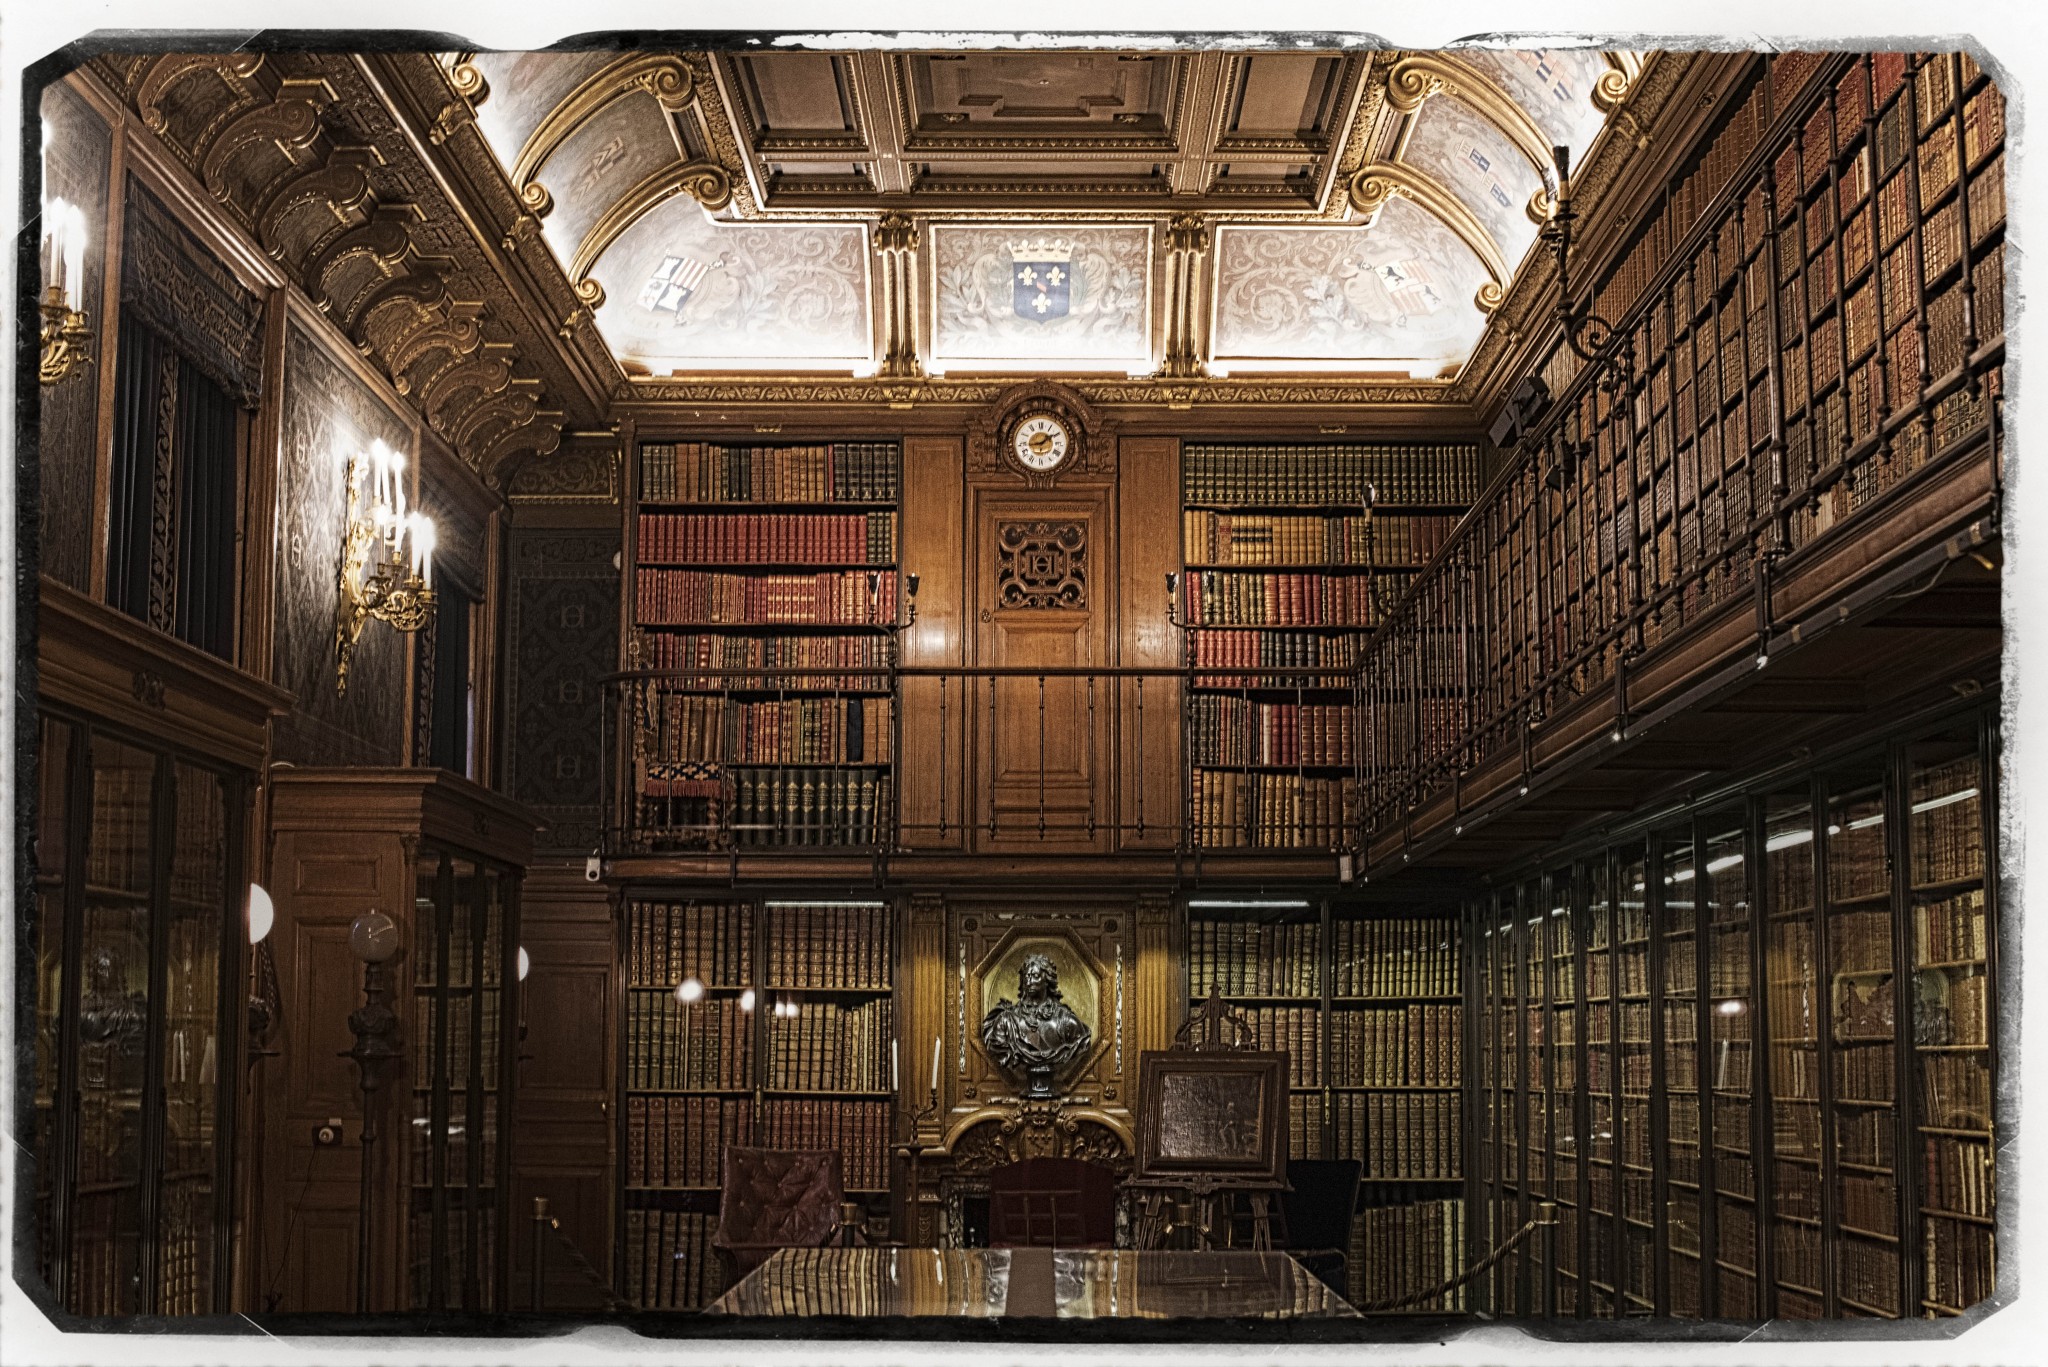
In this image below of the rather impressive library inside the Château de Chantilly, which I edited from Photoshop. I’ve gone to town with the filters adding a border, a Fuji film tone as well as a few other effects along the way.
 Chantilly library with a ton of filters and effects
Part 2…
In part 2 of this post, we'll explore Masks and the Compare features, as well as discuss general usage and tutorials on where to learn more.
More like this
- Tip
- Store
- Store
- Tip
- Tip
