About Lab, or Where Do Temperature and Tint Come from?
 The white balance block in Aperture 3 with “Temperature & Tint” as option
Did you ever wonder why the White Balance adjustment uses green and magenta for tint? This whole adjustment block makes a lot more sense if you think about what actually is behind its sliders.
The L*a*b* color space
The most common form of color representation we know is RGB (Red, Green, Blue). All colors are represented by a 3-tuple of those color components. There are different models to represent color which are better suited to certain types of image operations. One of them is L*a*b*, sometimes called LAB or quite often like in Aperture 3 just “Lab”. The L is for “Luminance” and contains the perceived brightness of that pixel, independent from its hue. The letters a or b have no dedicated name—they are just variables. Lab is based on the principle that there are contrasting colors like red/green (the “a*” in L*a*b*) or yellow/blue (the “b*”) and how they relate to each other. If you have the same amount of red and green in a pixel, the hues will cancel out each other. If you do this for the full circle of hues you get a color plane that looks like this:
 The colored plane on the left represents the “a” and “b” axis in Lab. The center of the plane is also the center of the coordinate system. a=0 and b=0 is in the center. The gray slider on the right is L (luminance).
The horizontal axis represents the colors from green/cyan (left) to red/magenta (right). The vertical axis goes from yellow (top) to blue (bottom). In the center, where the little circle is, all hues cancel each-other out.
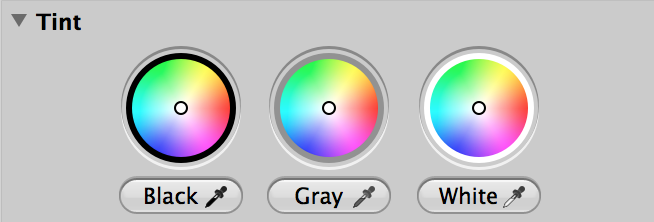
Now it's easy to see where the two White Balance sliders came from: Temp is just the slider for the vertical “a-Axis” and “Tint” is the slider for the horizontal “b”. The luminance is unimportant when it comes to correcting color hues—and white balancing is just a specialization of correcting a color hue. If this color plane looks familiar to you, the standard color wheel of the OS X color picker also uses this kind of representation. In Aperture you can find it in the tint section of the Enhance adjustment block:
 The “Tint”-Controls in the enhancement adjustment block shows three circles representing the Lab-plane. Interesting: Apple chose to always use the color plane with white luminance - even for the midgray and black wheel.
As already mentioned—the colors cancel each other out in the center. So the white point (or neutral gray/black, depending on Luminance) is exactly in the center of the plane. The farther away a color is from this center, the more saturated the color appears. If you want a more desaturated color, just move it in a direct line more to the center. A circle drawn with a radius of a particular distance from the center marks all hues at that particular level of saturation. So the different color hues are spread out like the minutes on an analog clock's face.
If you look at the color adjustment block, you will also quickly see the relation to the Lab-Plane; if you pick one of the color fields, the hue slider shows a hue range with the selected color in the middle. If you drag the slider to the left, you rotate the hue wheel clock-wise, and if you drag to the right, you rotate counter-clockwise—all without changing the saturation or luminance of the color. The saturation slider controls the distance from the center of the color plane. Luminance controls the perceived brightness.
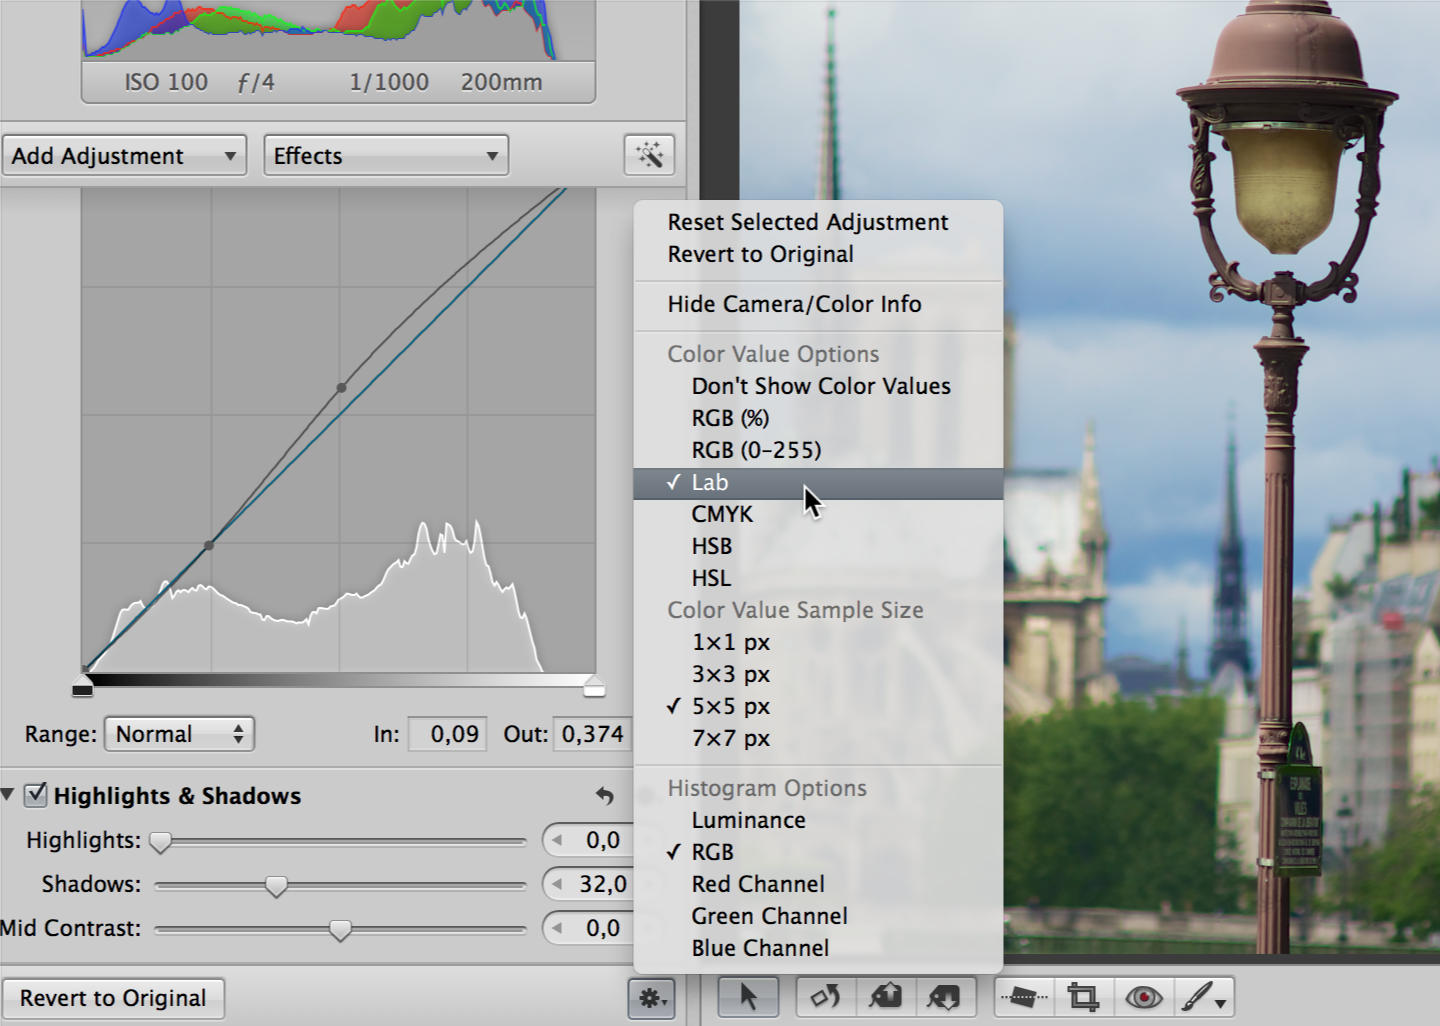
Many tools in Aperture use the Lab color plane as a way to show and control colors. You even can setup Aperture to show color values as Lab instead of RGB:
 Choose “Lab” in the color value options within the little gear menu at the bottom of the adjustment panel
This way you can directly see the tint of a part in your image, independent from its luminance. You no longer have to reason about R,G,B being nearly the same.
Back to white balancing
The interpretation of “a” as “Temperature” is quite intuitive and follows from the simple fact that many common lighting situations vary in that axis. Think of incandescent light bulbs, candles or even just the sun. Other light sources like gas emission lamps (neon lights) often have a greenish cast which can be corrected by moving the Tint slider more in the direction of red/magenta.
With the idea of color correction using the Lab-plane it is also easy to understand how white balancing using the color picker works. Using the color picker, you just select a part in your image that should be a neutral white/gray tone. The picked color clearly shows in what direction and how far the colors are off center. Aperture can then move all colors in the image in that direction and distance to globally neutralize the color cast.
What if there is no neutral white/gray tone?
Images without good neutral gray are quite common, especially in natural environments. Aperture 3 offers two specialized tools that make our life easier; white balance by skin tone and natural gray. Both work the same way as the neutral gray color picker, with one important exception—the reference color is not a neutral gray (the center of the Lab-plane) but the color of skin (or natural gray). What is the color of skin? It is actually a bit in the direction of red/magenta and yellow (and is virtually the same on everyone, regardless of skin “color”). If we look at how the color looks at different levels of luminance, this encompasses a wide range of skin “colors”. Calling it skin luminance would be more accurate! This specialized adjustments does not offer the Tint slider, but only the Temp slider.
Sometimes it just doesn't work
White balance is a global, linear adjustment. There are situations where you actually want non-linear adjusments (think “Curves”). Aperture doesn't have dedicated Lab-Curves, but you can apply the same knowledge using for example the blue channel or the red channel in curves. If you draw a point in the blue channel of curves below the diagonal line, these tones will get more yellowish.
Another option in difficult white balance situations is to restrict the adjustment on certain parts of the image. This can be done in Aperture by brushing in or out the white balance adjustment.
One last trick, that works for some pictures; sometimes the shadow parts of an image are colder than the bright parts. You can use the Tint controls to create different hue corrections for shadows, mids and lights.
More like this
- Tip
- Tip
- Tip
- Tip
- Tip

Comments
on August 14, 2014 - 4:59pm
Hi Jochen:
Excellent article covering a challenging topic. One quick clarification, which may help those looking to use white balance locally, is that brushing in/out white balance in Aperture is only available for the skin tone and the natural grey option. It is not an option for the temperature and tint setting.
Thanks again for the article.
on November 9, 2018 - 1:28pm
I’m confused!
If a* represents the red/green and b* the yellow/blue, isn’t Temp the slider for the b-Axis and Tint the slider for the a-Axis?
on November 12, 2018 - 11:00am
Yes you're right. The a* and b* is mixed up in in the paragraph that matches them up to “Tint” and “Temp”. It is right though, that a* is red/green and b* is yellow/blue.
I hope the rest did help you getting an intuitive understanding on the topic.
http://neonsqua.re
on November 16, 2018 - 2:36am
Hey Jochen, if you don't mind, send me the exact text that needs to be updated and I'll take care of it. Thanks.
@PhotoJoseph
— Have you signed up for the mailing list?
on April 15, 2019 - 7:08pm
Trying to reach Jochen, but this site doesnt have a pm function. Just read your ‘walks into a bar’ article from a few years back, and it inspired me to give Capture 1 a try. Does your code still work there?
bfindlay123@gmail.com
on April 17, 2019 - 6:29am
I honestly don’t know… but give it a try!
@PhotoJoseph
— Have you signed up for the mailing list?
on November 12, 2018 - 12:14pm
Thank you for replying and clarifying that point. I’m sorry, it was remiss of me not to thank you for the article, which I found helpful. It was just with a* and b* being the other way round I wondered if I’d misunderstood something.
I find photography knowledge is like an onion - as soon as you peel back one layer you discover another. I’ve been messing around with photography for years and I’m still learning something new every day, peeling back that onion!