Three Tips for Blending Textures with Your Photos
Introduction
Textures are a creative and fun way to add visual interest to your photos. Textures can take a photo in a whole new direction – an old world feel, add grunge, a painterly effect – just to name a few. I like to use textures with “I was here” photos and give them my own artistic touch.
In this article, I'll share three tips to get the most out of blending textures with your imagery. Using these tips, I'll take a plain photo of palm trees against a dull, gray sky and transform it into an image with an old world, painted look and feel.
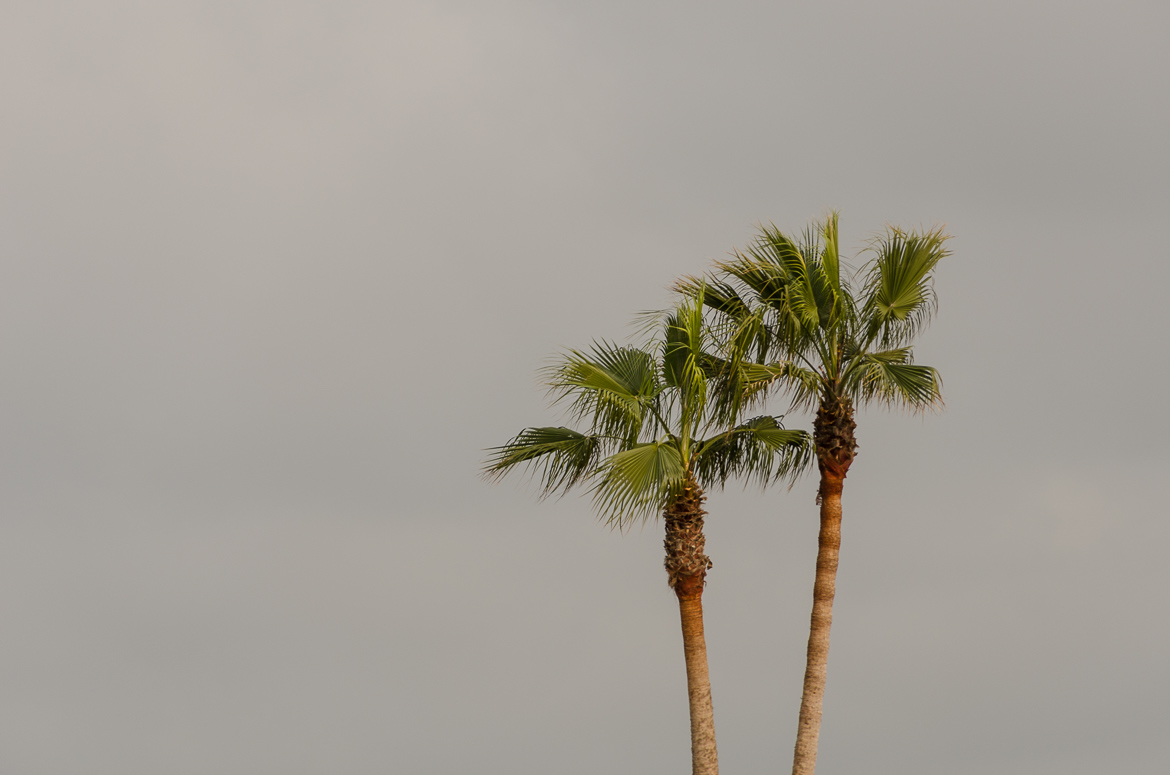
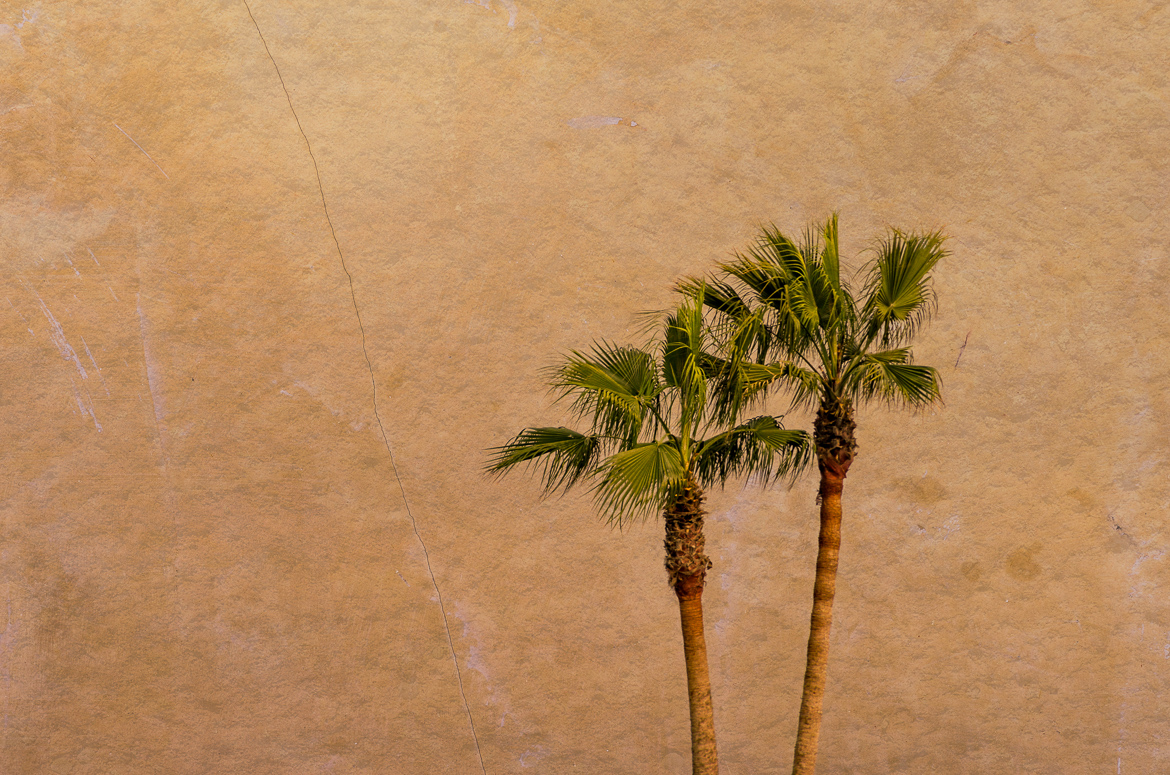
You will need layering software like Photoshop or ON1 Perfect Layers to start working with textures. With your photo loaded into your favorite layering software, create a new layer on top of your photo and fill it with a texture. The procedures for this vary by software product.
Having a sense of adventure and a willingness to experiment is a good thing, too. Tweaking sliders and trying different textures is part of the fun in creating a unique photo. And of course you'll need some textures!
Tip 1: Change Blending Modes and Layer Opacity
By default, a new texture layer will hide your photo entirely. For a good blend, experiment with the layer opacity and the blending modes. I begin by lowering the texture layer opacity to about 50% to start with. Then, I try out a variety of the blending modes. In the example below, I select the Soft Light blending mode and settled on a layer opacity of 35%.
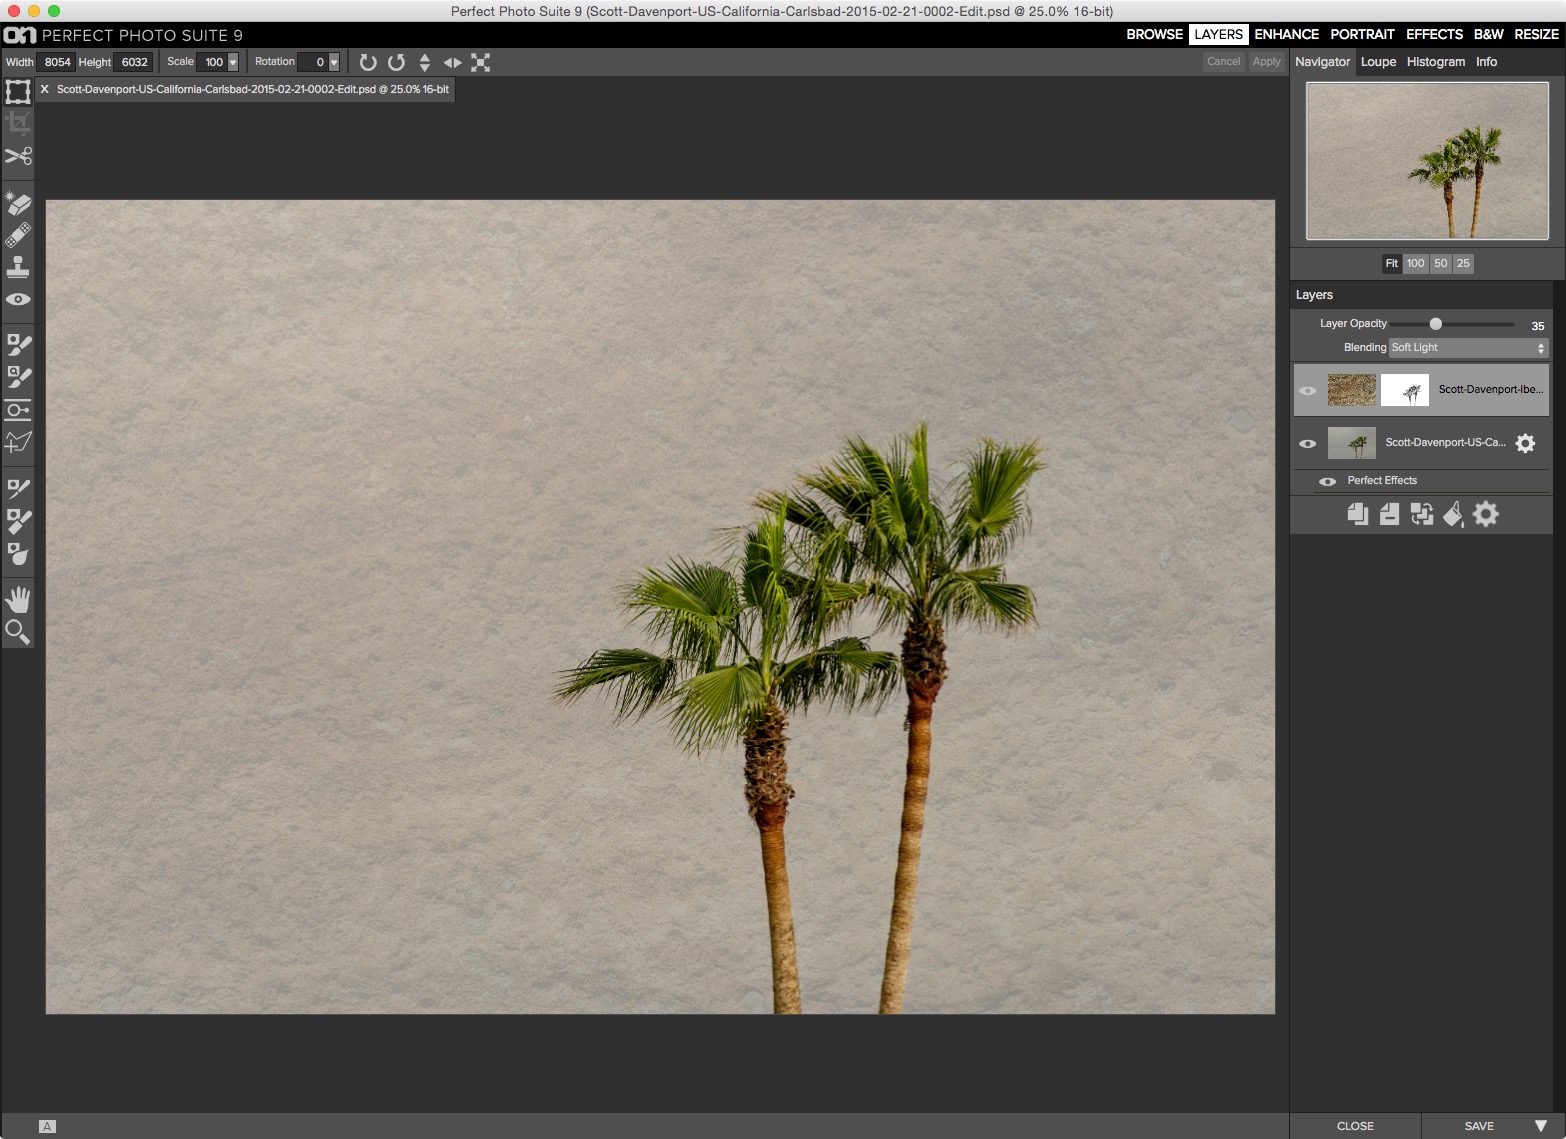 Tip 1: Change Blending Modes and Layer Opacity
There's no one size fits all for the blending modes. A “good” blending mode is very dependent on your photo and the texture you are applying. However, I've found that the Overlay, Soft Light and Hard Light blending modes work well for most textures, so those make for good starting points. Experiment! Try a few blending modes out and choose one you like. Also, don't be shy about revisiting the layer opacity to fine tune it for the look you want.
Tip 2: Use Multiple Textures
What's better than adding a texture to your photo? Adding two textures! Ok, well, that's not always true. Although layering multiple textures on a photo can often yield some very appealing and unique looks. I wanted more color in the background of this image and added a second texture layer.
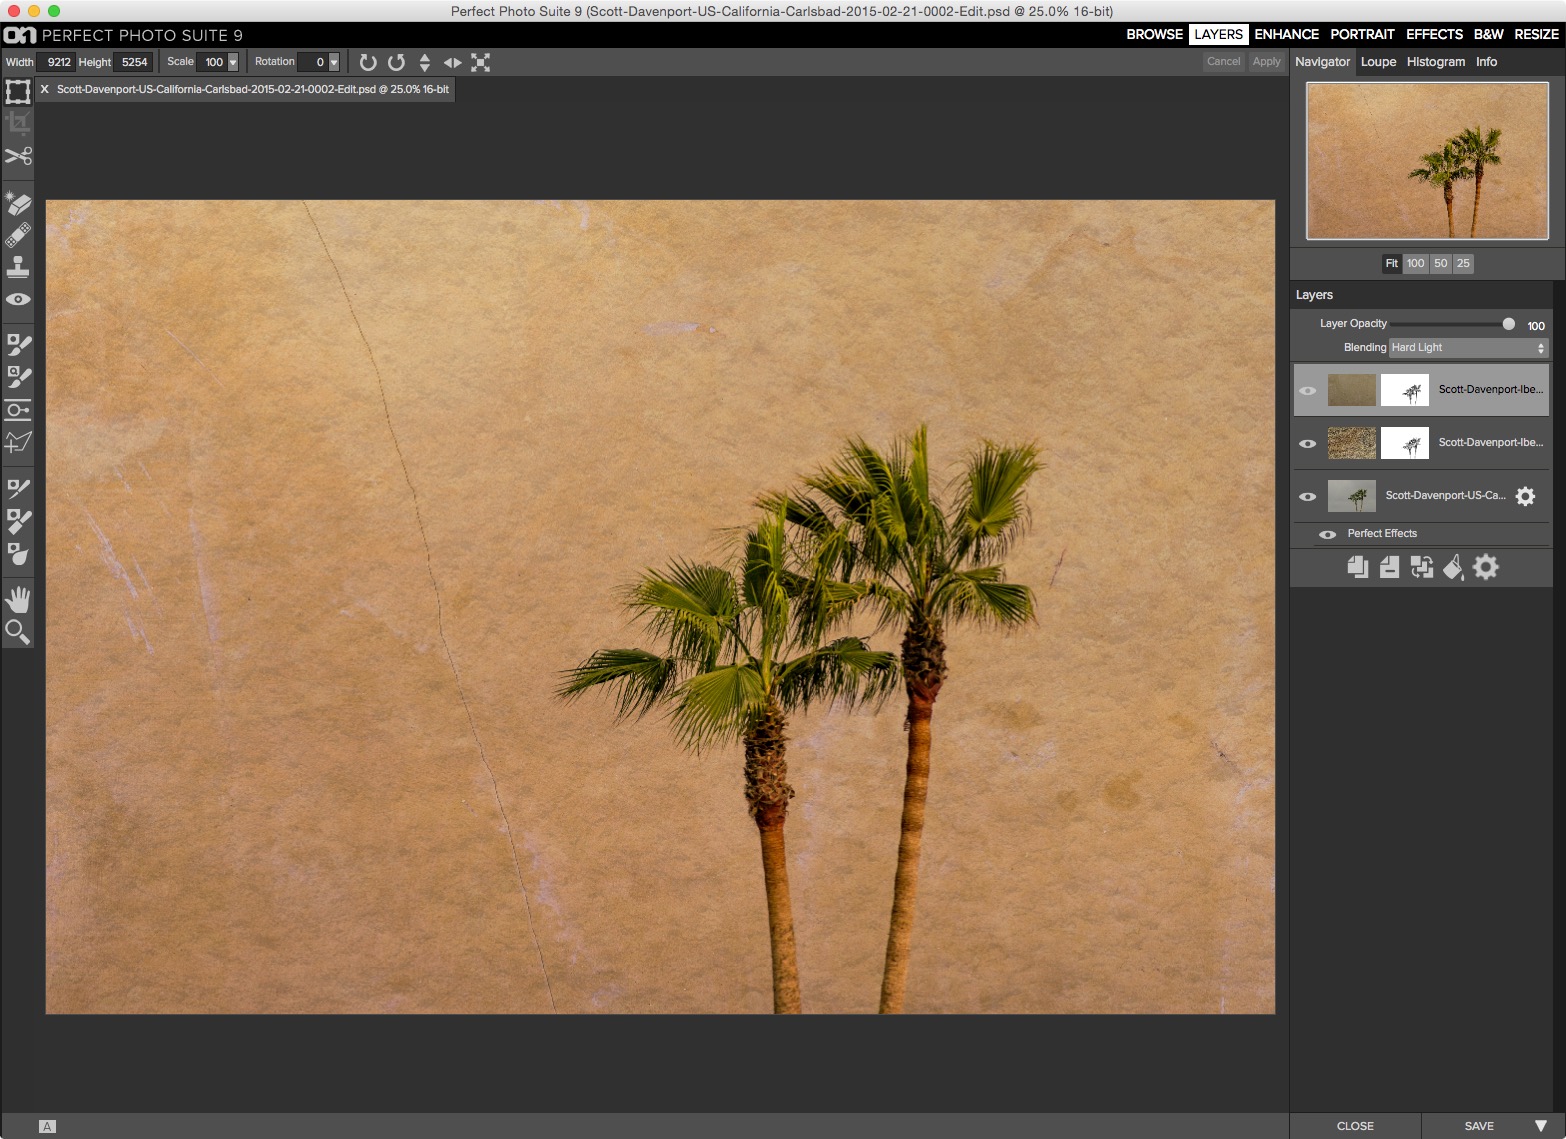 Tip 2: Use Multiple Textures
Notice for the second texture, I used the Hard Light blending mode at 100% opacity. You don't have to use the same blending modes and layer opacities for each texture applied.
Tip 3: Shrink, Stretch and Rotate Texture Layers
Textures that come with your layering software or you have purchased are of a fixed size and orientation. Often textures can be larger or smaller than your photo. Your layering software can stretch, shrink and rotate any layer. Try this with your texture layer. Reposition the texture so the features of the texture blend well with your photo. Rotate the texture layer so grains and patterns cut through your image at a different angle. Own that texture layer and bend it to your will.
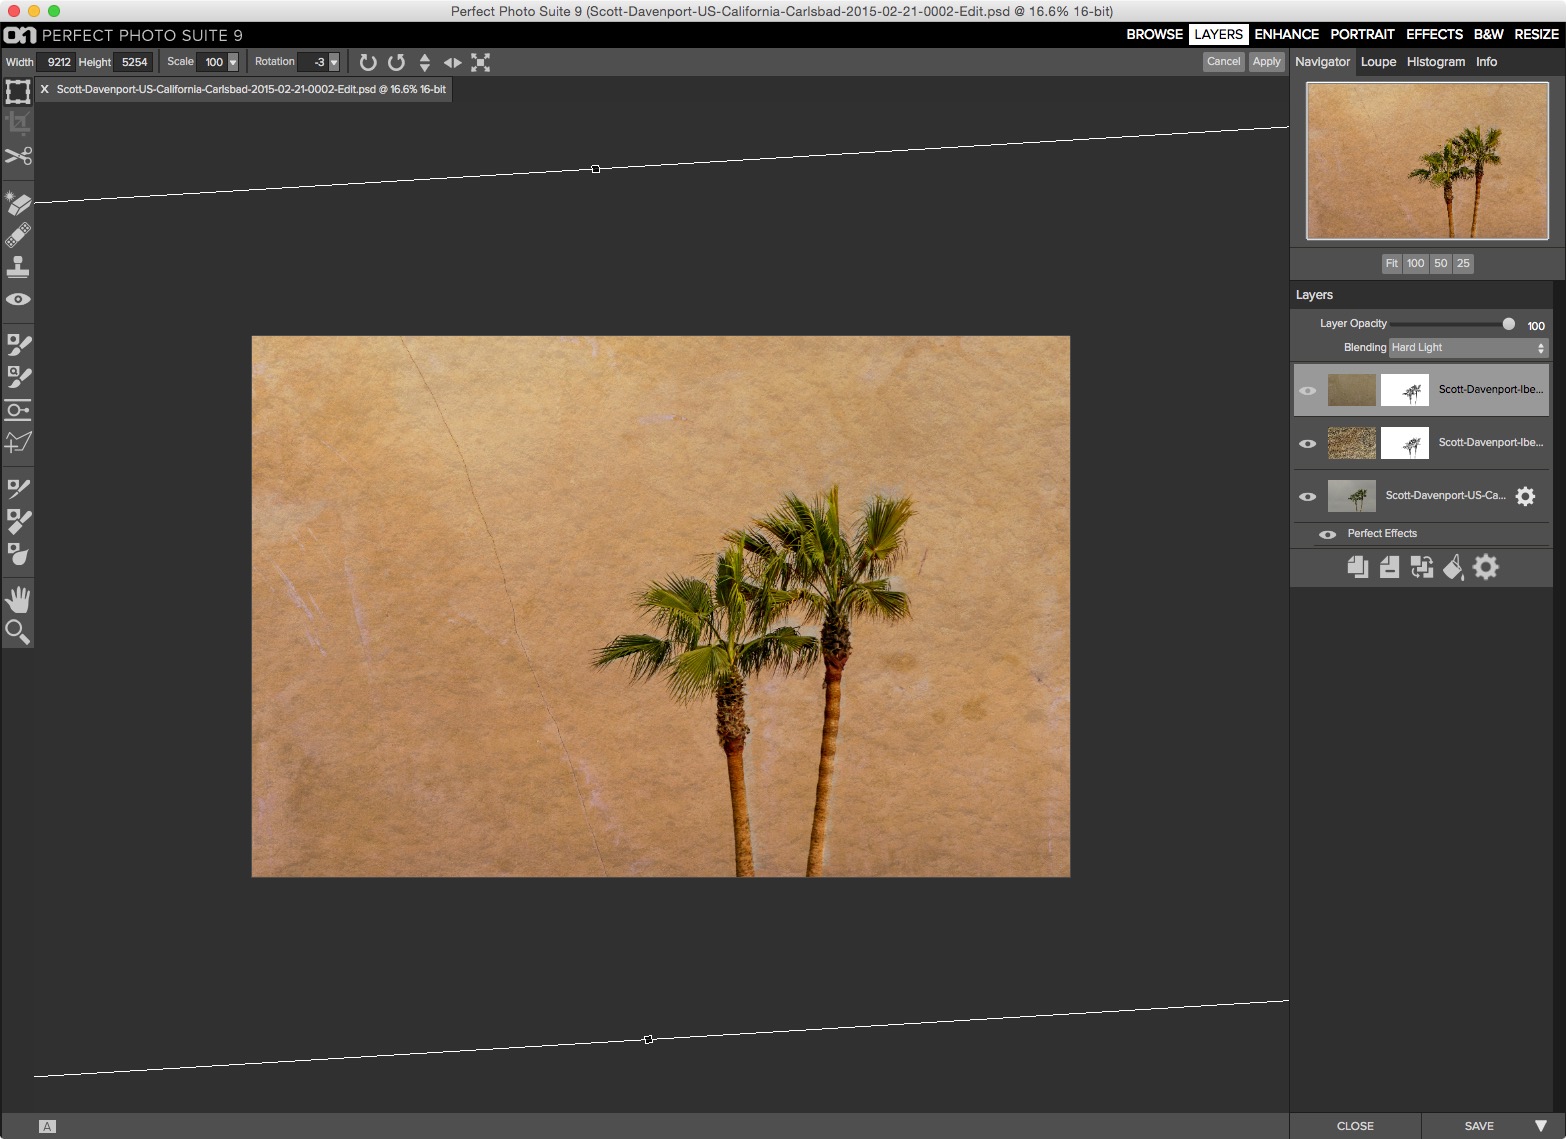 Tip 3: Shrink, Stretch and Rotate Texture Layers
I took the photo of the palm tree on a camera with a lower megapixel count than the resolution of the texture. I used the Transform tool in ON1 Layers to position the texture so the vertical crack occupied the left third of the image, giving it some extra visual interest.
Go Forth and Blend
That's it! Three simple tips for working with textures. I hope you find this useful, maybe even inspiring, and you explore blending textures with your photos.
Have you had any great results with blending textures into your photos? Share them in the comments below!
